
Setting up a basic guitar recording setup is something you’ll make great use of whether you write your own songs, enjoy jamming, want to record some covers or even analyze your playing and practice.
There are so many options out there today for recording guitar at home so in this guide, we’ll cover the basics to get you going. By the end of this guide, you will know exactly what you need to record your guitar to PC. You will also be able to choose the best options for you from the most popular gear available.
This guide will only cover PC as I don’t have a Mac. But if you have a Mac, you will find that almost all options still apply to you.
Basic Guitar Recording Setup
You’ve likely seen plenty of photos of recording studios with racks, monitors, and gear everywhere. They can look overwhelming as well as impressive. In the past, going to a professional recording studio was the only way to produce high-quality recordings.
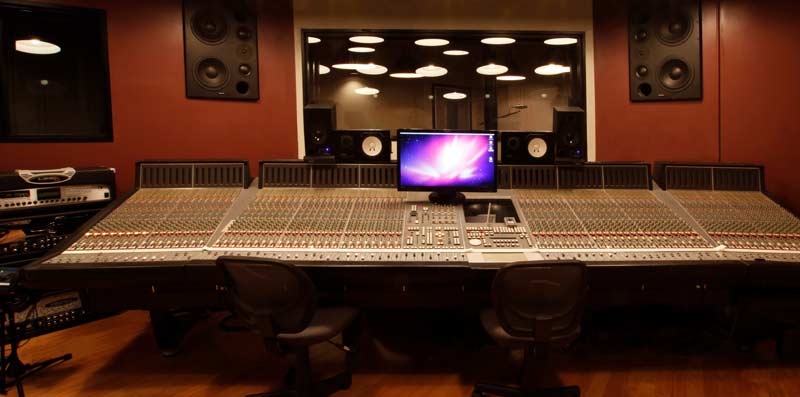
Today the truth is you can achieve the same quality (or higher in some cases) recordings at home on a very basic setup. Thanks to massive improvements in technology, high-quality recording gear is now very affordable. You can start recording high-quality guitar tracks with only a few extra pieces of gear.
Here is a quick run-through of a basic home guitar recording setup:
- An audio interface – this allows you to connect your guitar to your PC
- Microphone – while you can record electric guitar without one, it’s handy to have
- A DAW – a Digital Audio Workstation is the software you use to record, sequence and mix your tracks
- Plugins – plugins are software you can use within the DAW to do everything from apply guitar effects all the way to add virtual drums or synths
- Monitors/Headphones – you could use your normal PC speakers, but using high-quality studio monitors or headphones will make a significant difference
Pretty simple, right? All you need is a way to plug your guitar into your PC (or a microphone for acoustic guitar) and software to record.
The rest of this guide will take a close look at each component as well as which options to consider. If you have all the equipment you need, check out my tutorial on recording your first song.
Recommended Home Recording Studio Gear
If you know all about the gear and software required for a basic recording setup and want my recommendations, here they are:
- Audio interface: Focusrite Scarlett 2i2
- Microphone: Shure SM57
- DAW: PreSonus Studio One or Reaper
- DAW Controller: any controller in this guide
- Plugins: AmpliTube 5, BIAS FX 2, Addictive Drums 2
- Monitors: Mackie CR3
- Headphones: Audio-Technica ATH-M50x
There are alternatives to the recommended gear above, so read through the rest of the guide for full details.
Recording Electric Guitar to PC
The first piece of gear you need to consider is what you will use to connect your electric guitar to your PC. If you might need to record an acoustic guitar, skip to the next section.
This section will look at options suitable for electric guitarists. If you might need to record vocals, other instruments or acoustic guitar in the future, have a look at the next section.
Learn about the different ways you can connect your guitar to a PC in this guide.
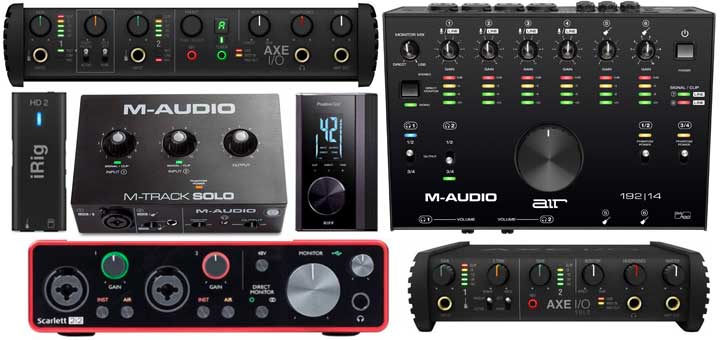
The easiest way to connect your guitar to your PC is to use an ‘audio interface’. These used to be large expensive units and didn’t produce a good quality signal. Today you can pick up a high-quality audio interface for under $100 that’s significantly better than units worth thousands in previous years.
Check out the Best Audio Interfaces for Guitarists in this guide.
The above guide explains everything you would want to know about audio interfaces and compares some of the best options available.
One look at the above audio interfaces and it will be clear that every guitarist has different recording needs. Read this guide to figure out what audio interface is right for you.
It’s worth mentioning that you will also see audio interfaces going ridiculously cheap (like $10). I highly recommend avoiding anything that cheap. When the first iRig came out, a lot of people got sucked in by cheap Chinese copies on eBay only to get frustrated when they didn’t work. Get a good quality audio interface – it’s worth paying a bit more to ensure you get a good quality unit.
Recording Acoustic Guitar to PC
If you plan on recording acoustic guitar or you play both acoustic and electric or you want to record vocals as well, you will need an audio interface that gives you multiple inputs.
There are plenty of options if you want multiple inputs, but I’ll keep things simple and recommend one of the most popular and highly rated audio interfaces.
Focusrite Scarlett Solo (3rd Gen)
As you can see below, the Focusrite Scarlett Solo gives you more flexibility with inputs compared to the iRig HD 2 above. This means you can record anything via microphone, electric guitar with the line in or other line-level instruments such as keyboards.
If you plan on recording acoustic guitar, I recommend buying an audio interface that allows you to record at least 2 microphones at the same time. This will mean you can record one microphone up close and one at a distance to get two different sounds from the same performance.
Then you can mix between the two to achieve a tone you prefer. Being able to record multiple inputs also means you can play and sing at the same time and capture both at once.
There are larger units if you want more inputs such as the Focusrite Scarlett 2i2 (2x the inputs) or the Focusrite Scarlett 2i4 (4x the inputs).

If you do buy one of these units, make sure it’s third generation (like the ones I’ve linked to) and not an earlier generation. The latest generation has better quality preamps and converters as well as small feature changes as explained in my guide on audio interfaces.
These units also come with a Lite version of Pro Tools and Ableton Live Lite, so it does give you software to get started recording straight away. But as you will read later, most Lite versions won’t give you the features you will want.
Alternatives to an Audio Interface
While I recommend getting a dedicated audio interface, there are alternatives. Many modern amps and multi-effects units can be used as an audio interface. For example, if you have a Line 6 amp or pedalboard, you will see a USB port on it. Plug it into your PC and you’re good to go.
One benefit of using your existing gear as an audio interface is that you can record the tones and effects you already play directly into the DAW. So if you have a preset on your multi-effects pedal you want to use in your recording, use the pedal as your audio interface.
Check out the alternative to using an audio interface in this guide on connecting your guitar to a PC.
Microphone
If you only plan on playing electric guitar and will plug your guitar directly into your audio interface, you won’t need a microphone. But if you plan on recording your amp, other instruments, acoustic guitar or vocals, you’ll want a microphone (and an audio interface with microphone input).
There are countless microphones available today and quite a few different types. As this guide is meant for beginners, I’m not going to talk about the pros and cons of dynamic vs condenser microphones or anything else on mic types.

Instead, I’m going to suggest one microphone to get you started, the Shure SM57. The chances are you have heard of it. It’s the most well-known microphone to guitarists and can be found in every studio.
For many guitarists, it’s the gold standard for recording a guitar amp. But it also works very well for other instruments and vocals. For a beginner recording at home, this is the perfect microphone. Fortunately, it’s really cheap so even if you don’t plan on recording much with a microphone, I recommend getting one.
At some point, you may want to buy another microphone more suited for acoustic guitar or other instruments, but the SM57 will always be useful so it’s a worthwhile investment.
DAW – Digital Audio Workstation
Once you have an audio interface set up to connect your guitar (or a microphone) to your PC, you will need a DAW. A DAW – Digital Audio Workstation – can be thought of as an entire recording studio in one software program. You know those massive mixing boards you see in all studios? In a sense, a DAW gives you a virtual version of that.
So you won’t need massive mixing boards to record and mix multiple instruments and tracks, you just need a DAW.
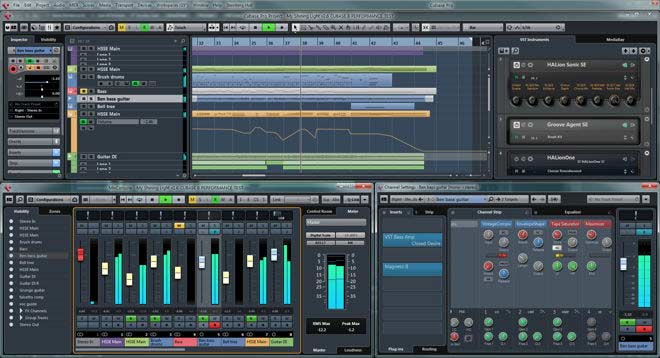
I know the above screenshot can look overwhelming, but it won’t take you long to learn how to use any DAW.
There are a few popular options available and each one I’ve listed below has a strong following which means there are plenty of tutorials on YouTube.
Each DAW gives you a different layout and experience so it’s comparing apples and oranges when comparing different DAWs. Many people will swear by a certain DAW, but it depends on what type of music you want to create and how you want to use it.
To find a DAW right for you, check out this guide on the Best DAWs for Guitar.
The above guide goes into detail on what to look for in a DAW and helps you figure out which one is right for you.
Before looking at the most popular DAWs available today, it’s important to point out that each option has one or more ‘Lite’ versions. A Lite version is basically a watered-down version of the full DAW. They usually limit the number of tracks you can record, limit the effects you can use, and may even stop you from using any plugins.
While one of these Lite versions may suit some guitarists, you will likely regret spending money on a Lite version. Most audio interfaces will include a free Lite version of a DAW, so it’s a good way to try a DAW out before buying the full version.
Here is a quick rundown of some of the most popular DAWs available today. I highly recommend reading my guide on the Best DAWs for Guitar for full details.
Pro Tools
You’ve probably heard of Pro Tools before. In the past, it was the gold standard and many artists still feel that way today. While a lot of high profile artists may use Pro Tools, I don’t really feel it’s as good as other DAWs for home guitarists.
I have tried Pro Tools in the past and I don’t recommend it. It feels clunky and like a remnant of the past. One of my students had a hard time with the iLok (a security device that unlocks the software) which meant she couldn’t even use the software.
Unless you have a specific reason to use Pro Tools, I recommend any other DAW listed below. The only reason I’m including it here is that everybody has heard of it.
Studio One
Studio One is fairly new compared to other DAWs. The maker of Studio One, PreSonus, also makes audio interfaces. They originally created Studio One to sell more audio interfaces. As of writing Studio One is in version 5 and is just as powerful as any other DAW that has been around for decades.
I recommend Studio One as your first choice for a DAW because it feels like it has been developed by guitarists rather than electronic music people. That’s important because the types of features you will want as a guitarist won’t appeal to somebody wanting to produce electronic music. It’s why I generally don’t recommend Ableton Live for guitarists because it was designed for DJs.
I switched to Studio One as my main DAW after many years using Cakewalk Sonar and it’s been fantastic. In my opinion, it’s one of the easiest DAWs to learn. If you feel overwhelmed when you see screenshots or videos of different DAWs in action, Studio One is quite easy to get the hang of. I also love the ‘scratch pads’ which is an easy way to experiment with different riffs or rearranging a song.
If you buy Studio One, I don’t recommend either the Prime version. This is a Lite version that cuts out the most important feature – third-party plugins. It might look like a great way to save money, but it’s not worth it for most guitarists. Make sure you get the Artist or Professional version (depending on what extra features and bundled plugins you want) and get version 5 (or higher if you read this in the future).
Find out how to record guitar in Studio One in this easy step-by-step tutorial. If you are considering getting Studio One, I recommend you read through the tutorial so you can see what it’s like to use.
Cubase
Cubase is possibly the most popular DAW for musicians focused on audio rather than MIDI. It has been in development for a long time and has evolved into an extremely powerful DAW. I don’t use Cubase because I prefer Studio One’s layout and tools, but many guitarists swear by Cubase.
It is the most expensive option I’ve covered here, so unless there’s a specific reason why you prefer Cubase, I still recommend Studio One.
Be careful if you get the Artist version as it may not contain the features you want. I wouldn’t even consider the Elements version.
FL Studio
FL Studio was originally called FruityLoops and was designed for electronic music creators. At the time it didn’t record audio at all. It eventually evolved into a full DAW with audio recording and exploded in popularity. It’s now one of the most popular DAW but still has a massive following in the electronic music circle.
I personally use FL Studio as a way to experiment and come up with song ideas. As FL Studio was originally meant for beat creation, its step sequencers and loops make it easy to come up with drum parts for riffs as well as loop and move riffs around to work on structuring a song.
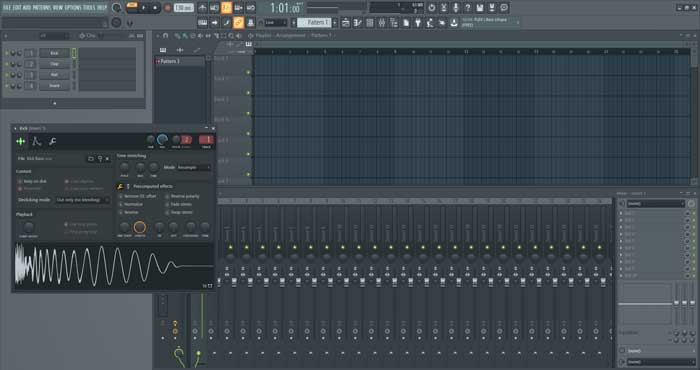
FL Studio may not be the best choice for beginners or people who want to record straightforward guitar-based music. But, if you like the idea of mixing loops and beat creation with your guitar, it’s great fun to use.
Find out how to record guitar in FL Studio in this tutorial. The steps you need to go through to record guitar in FL Studio will give you an idea of how different it is to other DAWs.
Reaper
Reaper is the lowest price full-featured DAW available today. It uses a simple interface and packs some fantastic editing features.
While I put off using Reaper in the early versions, it has become an absolute top contender as one of the best DAWs for guitar.
If you’re on a budget but still want a full-featured DAW, I highly recommend Reaper. Reaper is cheaper than most ‘Lite’ versions of other DAWs, yet packs in more features.
Find out how easy it is to record guitar in Reaper in this step-by-step tutorial. Once you compare Reaper to other DAWs like Pro Tools, choosing Reaper will be easy.
Other DAWs worth mentioning
Ableton Live – this is an extremely popular DAW for electronic music and live performances. It’s radically different from other DAWs and designed for DJs and live performers. While you can use it as a guitarist and many guitarists do for live performances, I recommend a more traditional DAW for recording. But if you’re a live performer who experiments with loopers for layering, you might want to consider Ableton Live.
Check out this tutorial to see how to record guitar in Ableton Live. If you’re considering Ableton, this guide will give you an idea of what it’s like to use a recording DAW.
Logic Pro X – while this guide is for recording guitar on PC, it’s worth mentioning for any Mac users reading this that a very popular Mac-only option is available. I don’t have a Mac so I can’t talk about it, so check out Logic Pro X here.
Cakewalk Sonar – I used to use this DAW for quite a few years before switching to Studio One. I’m sure it’s made a lot of improvements since the last time I’ve used it, but I doubt it’s at the same level as Studio One, Cubase, or Reaper.
Audacity – Audacity isn’t a DAW, but it may suit a lot of guitarists looking at getting started with recording guitar. Audacity is a very simple audio editor you can use to record and edit tracks. Check out my step-by-step tutorial on How to Record Guitar in Audacity here to learn more. While Audacity isn’t anywhere as powerful as any of the above DAWs, it is free and an easy starting point.
Find the right DAW for you in this guide.
Plugins for Guitarists
Once you have your audio interface and DAW set up, you’re ready to start recording. But unless you connect your amp to your audio interface, you’re only going to be recording a dry signal.
Fortunately, there are countless plugins you can use to craft the perfect guitar tone.
To learn everything you need to know about plugins as well as the best plugins for guitar, check out my Ultimate Guide to Plugins here.
Let’s have a quick look at plugins and some basics to consider.
The plugins below are ‘VST’ plugins and your DAW needs to be able to use VST plugins for them to work. This is why most Lite or Artist versions of DAWs aren’t worth your time because they usually don’t allow VSTs.
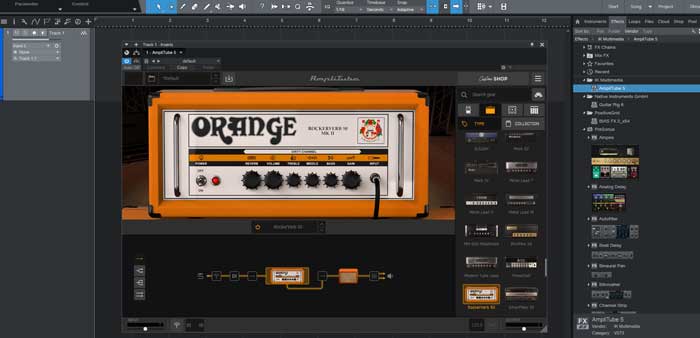
AmpliTube, Guitar Rig, BIAS FX, Helix Native
The most valuable type of plugin for you as a guitarist will be one that allows you to shape your tone with amp & effects models. These plugins allow you to record a dry signal from your guitar, then set up any type of amp and effects rig you want. It’s ridiculously easy to achieve high-quality tones for your recordings with any of the most popular modeling plugins.
My guide on Guitar Plugins explains the difference between popular plugins such as AmpliTube, Guitar Rig, BIAS FX, Helix Native, and others.
Drum Kit Virtual Instrument
The quality of any drums you use will make or break your recording. Nothing screams ‘amateur’ more than poorly recorded drums. If you don’t have a drummer to use in your recordings or you want super high-quality sounding drums, you’re in luck. There are quite a few ‘virtual instruments’ available with high-quality samples of drum kits.
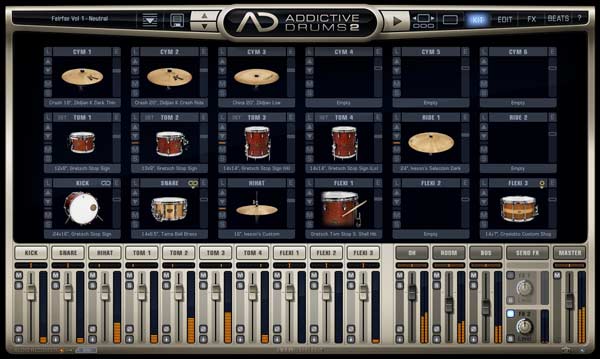
Basically what these virtual instruments do is play whatever you want. In the DAW, you simply enter in the drum beats and fills in a track, and you will hear a realistic-sounding drum kit play it. The good plugins will sound just like a real drummer on a real kit.
Find out how to create your own drum tracks in a DAW in this guide.
Once you see how powerful drum plugins can be, you’ll be able to use them to jam along with or write professional-sounding tracks for your guitar recordings.
Check out some great free and paid drum plugins in this guide on Drum Plugins.
Studio Monitors
The speakers or headphones you use when mixing your recordings will play an important role in the end result. The reason professional musicians and sound engineers specifically use studio monitors is that regular speakers or headphones add too much color to the sound.
Most consumer headphones completely change the tone you hear to make it sound more impressive. They usually increase the bass, cut some of the mids and raise some higher frequencies to make music sound different.
When you mix a song in a studio, you don’t want to hear an ‘enhanced’ version through your speakers, or else you may not be able to mix the song properly. If your speakers add bass to what you’re hearing, if you mix the song then listen to it on different speakers, you’re likely to be disappointed with the results. A good set of studio monitors will ensure you hear the ‘real deal’.
Choosing a good studio monitor is a big topic that causes a lot of heated arguments among audiophiles. If you thought guitarists argue a lot over guitar amps, it’s significantly worse with studio monitors.
So to avoid getting a constant stream of emails telling me off, I’m simply going to recommend the monitors that were recommended to me.
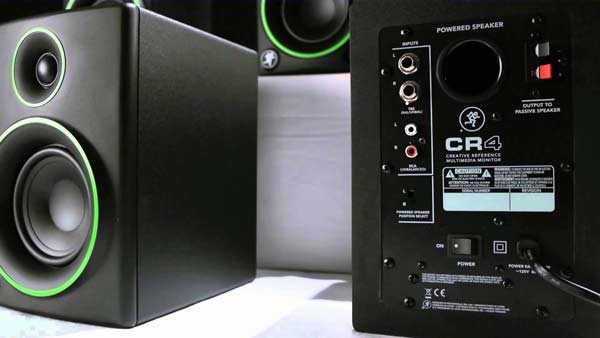
The Mackie CR series is incredibly popular and praised for its quality at a very good price. When you consider that some people pay thousands for monitors, these are a steal for the quality you get.
The series offers 3″, 4″ & 5″ monitors at 50 watts. Two of the models (CR4BT & CR5BT) also offer Bluetooth streaming.
Studio Headphones
If you will be recording acoustic guitar, vocals or any other instrument with a microphone, you will need some good quality headphones. Just like monitors, headphones is a touchy topic as everybody seems to have a different opinion on which headphones are the best.
If you already have headphones, it’s up to you whether you feel like an upgrade would be worthwhile or not.
My recommendation if you already have a good set of headphones is to invest in some good monitors to use when you’re not actually recording.

The top-rated studio headphones on Amazon at the moment are the Audio-Technica ATH-M50x as shown above. They’re rated overwhelmingly positive so if you’re after the best, these will probably suit you.
Alternatively, the Sony MDR7506 are just as popular and a bit cheaper.
Either option will likely be a big upgrade from typical headphones, but whether it’s worth the upgrade is up to you.
Check out my guide to playing guitar with headphones for more headphones recommendations.
DAW Controllers
While you can use your keyboard and mouse to control every aspect of your DAW, there is a better way.
A DAW controller is a USB or MIDI device you plug into your computer that can control any aspect of the DAW you want.
The below photo shows a few different examples of what DAW controllers look like:

DAW controllers can include knobs, buttons, sliders, pads, keys, and expression wheels to allow you to record, play, mix, or create virtual instrument tracks.
Using a DAW controller makes using a DAW far simpler and you don’t need to memorize a bunch of keyboard shortcuts. The record button records, the play button plays, the knobs can be set to control any guitar amp setting or effect you want, etc.
Find out more about DAW controllers and some of the best options in this detailed guide.
If you’re serious about building a home recording studio, I highly recommend getting a DAW controller that suits your recording needs.
Getting Started With Your Home Recording Studio
So you’ve now got all the hardware and software you need for your home recording studio, now what? First I recommend going through my Tutorial on Recording Your First Song at Home. The tutorial will show you how to get started with all the above equipment and software so you can record a full song with all instruments.
Here are some things you can do to get started:
Record guitar parts to your favorite song
This is a good way to get the feel for using the DAW and your equipment. Pick a song you know well and load the song into the DAW. Then create a new track, set up the amp tone you want and record yourself playing along with the original.
If there are multiple guitar tracks in the song, create multiple tracks in your DAW and record each part. If you have a bass guitar, try recording that on another track.
After you record all your parts, mute the original track and hit play. Now you can experiment with mixing your guitar tracks, adjusting the tone and effects and possibly add the drum tracks if you have a plugin such as Addictive Drums or EZdrummer.
Write a song from scratch all in the DAW
Learning how to write a song from within the DAW is a great skill to develop. Not only will it help you come up with creative ideas and quickly put songs together, but you can easily save any ideas you come up with for the future. You will never have to worry about forgetting a great riff or idea again as you will be able to record and save everything.
Record a riff or chord progression and copy and paste the idea over and over so it loops. Now you can practice coming up with solos, lead lines, melodies or other riffs over the top of your idea. Record your ideas and keep layering more ideas. After a bit of practice, you’ll get the hang of it and will start coming up with really interesting ideas for songs.
Record other musicians
Once you get the hang of recording guitar using a DAW, ask another musician to come in and record something. This will teach you a lot about other instruments, mixing and editing. If you know somebody who sings, prepare a backing track before they come in. Practice editing the track using multiple takes, try recording harmonies and backup vocals and use effects such as reverb to make the vocals shine.
Not only is it a lot of fun recording other musicians, but you will learn so much from the experience. Reach out to as many different musicians as you can and learn how to make each type of instrument sound great.
Guitar effects course
The more you understand how different guitar effects work and how they interact with each other, the easier it will be to create the tones and sounds you want. This guitar effects course digs deep into all common types of guitar effects, how they work and how to use them. Check it out if you’re interested in learning more about guitar effects.
Updates and More Guides
Get updates on any guides, reviews, and lessons relating to using your home recording gear by subscribing to email updates. I’ll be covering a lot of topics related to recording at home in the future, so if you found this guide useful, subscribe to get more tips and advice.
Here are some guides to get you started recording guitar at home:
- Best Free Guitar Plugins and Software
- Best DAWs for Guitar (with Tutorials)
- Best DAW Controllers
- Best Audio Interfaces for Guitar
- How to Connect Your Guitar to a PC
- Best Guitar VST Plugins
- Best Drum Plugins
- How to Run Any VST Plugin as Standalone
- Recording Guitar FAQ (Ask Your Questions Here)