
Connecting your guitar to a PC or laptop gives you a way to start recording your playing, experiment with different amp simulators, effects, plugins, and more.
The good news is that you only need some very basic equipment to connect an electric or acoustic guitar to a PC or laptop.
In this guide, you will learn:
- The different options to connect a guitar to a PC and which one is right for you
- Different programs and plugins you can use
- How to use your computer as an amplifier
Once you connect your guitar to your computer, read this guide for more information and advice on recording guitar at home.
How to Connect an Electric Guitar to a Computer
Connecting an electric guitar to a computer is easy, but it does require a special piece of hardware called an audio interface.
To connect your electric guitar to a computer, you need to use an audio interface that will safely process your guitar’s signal into something your computer can use. If your computer has audio input jacks, you cannot directly plug your electric guitar into it and you must use an audio interface.
If you try to plug your guitar directly into your computer’s mic or line-in input jacks using an adapter, you risk damaging your guitar or your computer. The audio input jacks weren’t designed to handle input from your guitar and it won’t work.
There are a couple of different options for connecting an electric guitar to a computer, so let’s go through each option.
Audio Interface
The most popular way to connect an electric guitar to a computer is by using an audio interface. An audio interface is a simple box that allows you to plug your guitar or other inputs into it, and it converts the signal into a digital signal to send via USB to your computer.
The most popular range of audio interfaces for guitarists is the Focusrite Scarlett range (link to Amazon to see the different models, features, and prices). The below photo shows the Scarlett 2i4:
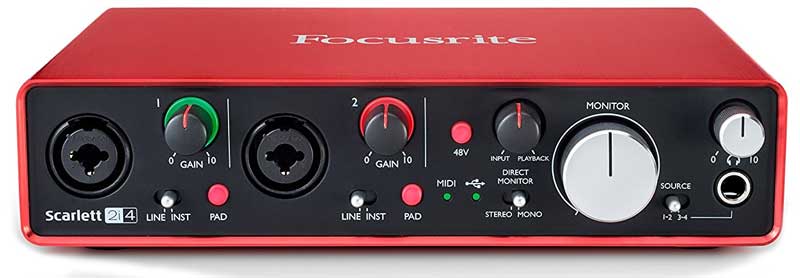
While there is a lot of buttons and knobs on the box, the basic idea is that it allows you to plug a guitar cable from your electric guitar to the interface. The interface then processes the guitar signal and sends it via USB to your computer.
You can see that the above interface allows you to plug multiple instruments (or microphones) in at once. This is great if you’re planning on recording as you can record multiple microphones or multiple instruments at the same time.
If you might want to record acoustic guitar or vocals in the future, you may want to get an audio interface bundle like this one at Sweetwater which includes a condenser microphone and headphones.

Most audio interfaces also allow you to connect headphones directly into the interface which allows you to play guitar in silence. Check out this guide if you’re interested in playing electric guitar with headphones. The guide includes the best options for headphones and other advice.
While the above interface is a great option that will suit many guitarists, a simpler and cheaper option is the iRig HD 2 by IK Multimedia:
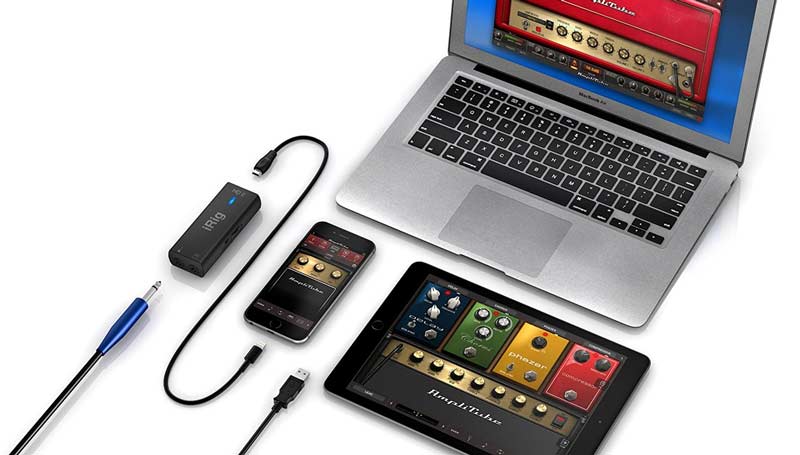
The small interface may not have the ability to process multiple instruments or microphones at the same time like the Focusrite Scarlett, but it is a good option if you only want to plug one guitar into your computer.
You can also use it to connect to a Mac, iPhone or iPad (Android not supported). This means you can use the iRig to play the guitar while traveling or even if you don’t have a computer with you.
Find out more about the iRig HD 2 and the software it comes with in this review.
When deciding what audio interface to get, think about the following questions:
- Do you want to be able to record multiple instruments at the same time?
- Do you want to be able to connect a microphone to your computer?
- Will you want to record drums in the future (requires multiple microphones for best results)?
- Do you want the interface to connect to your smartphone as well or just a computer?
Different interfaces have different features, so have a think about what is important to you. All interfaces will do the basic job of connecting your guitar to a computer.
Multi-Effects Pedal
While the most popular option to connect an electric guitar to a computer is with an audio interface, most modern multi-effects pedals can also do the job.
Almost all multi-effects pedals today have a USB port which allows you to connect your pedal to your computer and use it as an audio interface.
For example, the below photo shows the USB port on the small and powerful HX Stomp by Line 6 (find out more about Line 6’s multi-effects pedals here):

Even small multi-effects pedals like this one are likely to have a USB port to connect to a computer.
The big advantage of using a multi-effects pedal to connect your guitar to your computer is that you can continue to use the pedal’s effects and tones while playing through your computer. This is great if you want to record those tones or you just want to jam along with some backing tracks.
You can also bypass any effects or presets you have set up on your multi-effects pedal if you want to record a dry signal. If you already have a multi-effects pedal, have a look to see whether it has a USB jack. If it does, you may be able to use it as an audio interface. Check your pedal’s manual to find out the settings you need to know to set it up as an audio interface (every pedal is different).
Guitar Amp
If you want to connect your guitar to a computer because you don’t have a guitar amp, this option won’t help you. But if you do have an amp, you might want to check if it has a USB jack on the back.
Many modern amps include a USB port which allows you to connect your amp to your computer and use it as an audio interface.
For example, the below photo shows the back of the popular BOSS Katana amp:
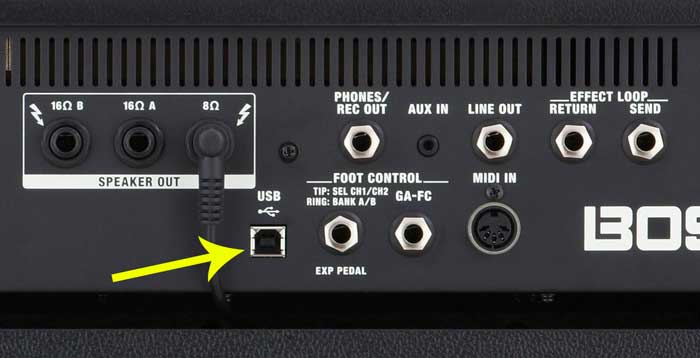
You can see that it includes a USB jack along with all the other common jacks you tend to see on a modern guitar amp. If the back of your guitar amp has a USB port like this one, you can probably use it to connect to a computer.
The big advantage of connecting your guitar amp to your computer is that you can jam along and record your guitar using any tones produced by your amp. So if you love the sound of your amp’s drive channel, you can directly record that tone without having to use a microphone in front of your amp.
Finding the Right Option for You
Each of the above options suits different guitarists. If you already have an amp or pedal with a USB jack, all you need is an appropriate cable to connect your guitar to your computer (find out about the different types of USB cables here).
If you don’t have a guitar amp or don’t want to buy a multi-effects pedal, an audio interface is a cheap and effective way to connect your guitar to your computer. With an audio interface always connected to your computer, you can use your computer as a guitar amp and run any plugins or programs you want.
For most guitarists, an audio interface is the most flexible option. You can get a good interface for under $100 that will produce excellent quality recordings.
How to Connect an Acoustic Guitar to a Computer
If you want to connect an acoustic guitar to a computer, the options that suit you depend on the type of acoustic guitar you have.
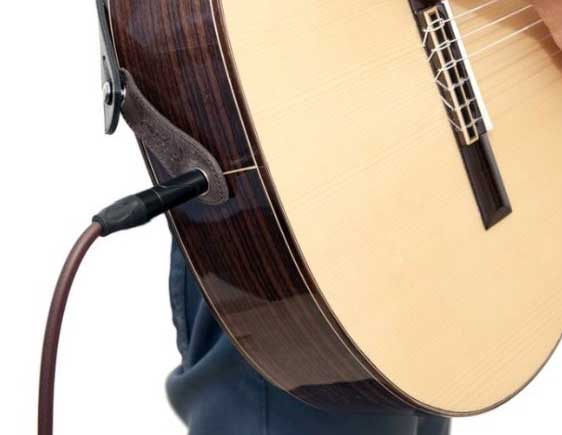
Acoustic Guitars with Internal Pickups
If your acoustic guitar has an inbuilt pickup and you can plug a cable into it, you can use any of the options covered above for electric guitars.
Acoustic guitars with an internal pickup are typically called ‘electro-acoustic’ guitars.
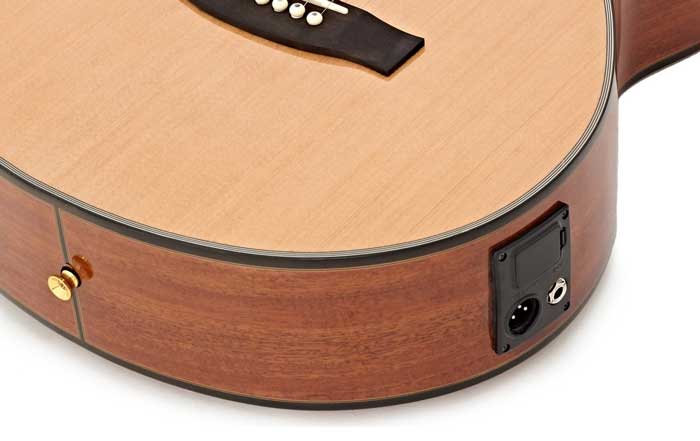
The above guitar shows two different jacks (XLR on the left and standard guitar cable on the right). Most electro-acoustic guitars will only have a standard guitar cable jack.
If your guitar doesn’t have an obvious jack area like the above guitar but it does have an area where you can put in a battery, check the end strap pin as shown below:
If your acoustic guitar does have a jack where you can plug a cable into it, you have the widest range of options to connect your guitar to a computer.
You can use:
- an audio interface
- a multi-effects pedal (if it has USB out)
- an acoustic guitar amp (if it has USB out)
- a microphone with an audio interface
The recommended option for an electro-acoustic guitar is to get an audio interface that offers multiple inputs such as the Focusrite Scarlett 2i2:
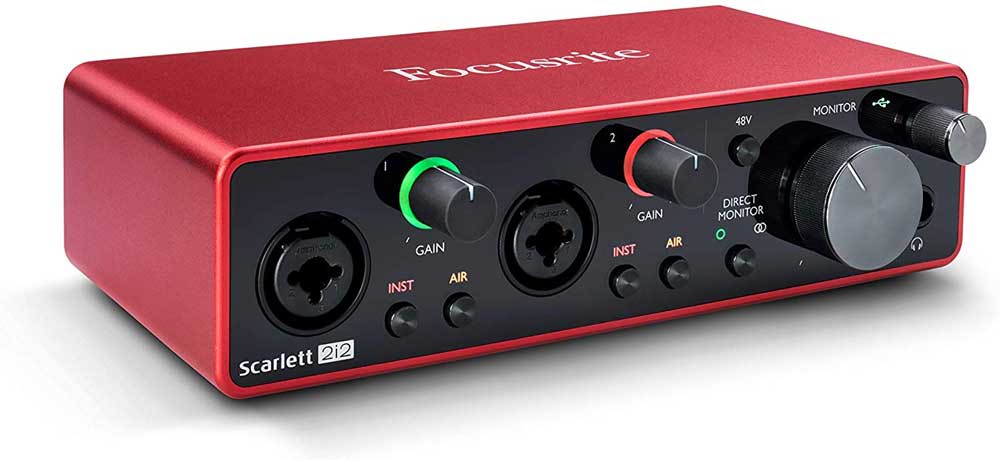
With an audio interface like this one, you can plug your guitar directly into the first input jack, then you can optionally plug a microphone into the second input jack and record both at the same time.
This means you can capture two different sounding signals of your acoustic guitar at the same time. This is a great way to record acoustic guitar because it gives you flexibility with your tone. You can blend your recording between the two inputs based on what you like the sound of.
You can position the microphone anywhere you want to capture different tones not possible with the internal pickup alone. Having two different tonal recordings of your guitar parts is highly recommended.
Acoustic Guitars Without Inbuilt Pickups
If your acoustic guitar does not have an inbuilt pickup, you will need to use a microphone with an audio interface to get your guitar signal into your computer.
Any audio interface that offers microphone inputs (like the above Focusrite Scarlett) will be a fine choice. I recommend getting an audio interface that offers more than one microphone input at the same time so you can record your guitar with multiple microphones in different positions.
An alternative to buying an audio interface is to buy a microphone that can plug directly into your computer. I don’t recommend plugging a microphone into your computer’s mic input as the preamp on a typical computer soundcard sucks.
Something like the iRig Mic Studio may suit you:
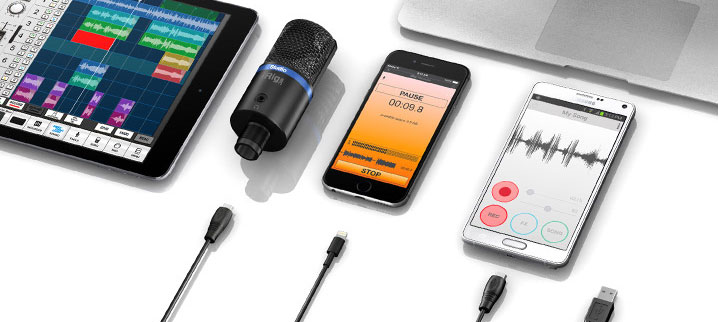
The iRig Mic Studio is a microphone with a USB output that can connect to a PC, Mac, Android, or iOS device. This makes it a great option for acoustic guitarists wanting to record ideas at home or while traveling.
When connected to a computer, it acts as a typical audio interface. You can plug headphones directly into the microphone and it works in any DAW (find the best DAWs for guitar in this guide).
The iRig Mic Studio is my go-to option whenever I want to capture ideas on my acoustic guitar, record vocals or acoustic guitar parts, or for any voice recordings for YouTube videos. Being able to connect to a variety of devices is a great benefit to have.
Check out my full review of the iRig Mic Studio here to learn more about it.
Using a Computer as a Guitar Amp
Once you choose a method to connect your guitar to your computer, you can look at how to use your computer as a guitar amp.
To use your computer as a guitar amp, you need to use software that models guitar amps and effects. Programs such as AmpliTube, Guitar Rig, BIAS FX, or Line 6’s Helix Native all allow you to use your computer as a guitar amp.
The basic idea is that these programs or plugins do everything a guitar does in a digital manner.
Learn everything you need to know about plugins as well as the best plugins for guitar in, my Ultimate Guide to Plugins here.
Let’s go through the most popular options so you can decide which program is right for you:
AmpliTube 4 by IK Multimedia
AmpliTube 4 is their current version of a very popular amp and effects simulation suite. AmpliTube 4 can be run as a standalone program or as a plugin inside a DAW (Digital Audio Workstation).
The below screenshot shows AmpliTube 4 running as a plugin inside a DAW for recording purposes:
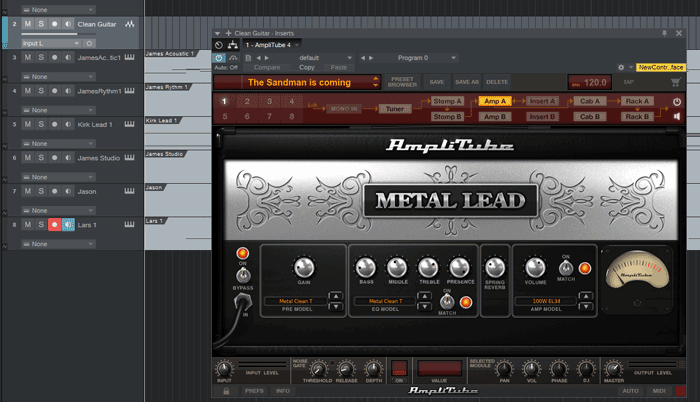
You can see that this screen looks like a typical guitar amp. You can change amp models, dial in different settings, or even change the type of tubes inside the amp model to suit your tastes.
AmpliTube 4 can also be used to set up different effects pedals as shown below:
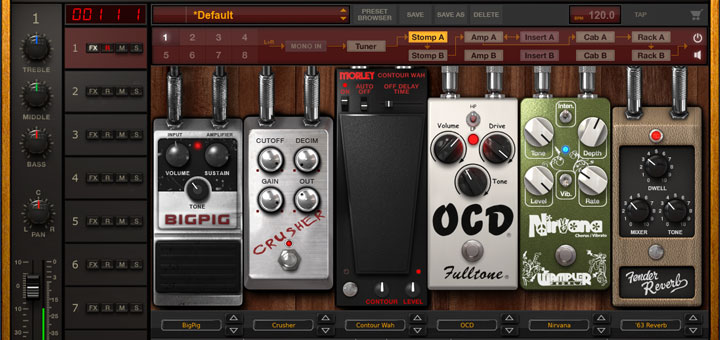
You can select from a range of different effects and set up a rig in any way you want. Simply drag the pedals around to change the order and tweak the settings as you would with a real pedal.
There are other features such as cabinet simulation, setting up different mics and rooms, or even using rack effects.
Check out my full review of AmpliTube 4 here to learn more about its features and how to get the most out of it.
Note: it’s worth mentioning that if you buy the iRig HD 2 (the audio interface mentioned earlier), it comes with the full version of AmpliTube 4. So if you were planning on getting that audio interface, you will be able to use AmpliTube 4.
If you have AmpliTube 4, I use it in Part 2 of my Guitar Effects Course to demonstrate building different types of tones from scratch. While the course isn’t a tutorial for AmpliTube 4, you may find the course helpful by seeing how you can create different tones and presets.
Verdict: Highly recommended. I use AmpliTube 4 all the time for recordings and the range of options it gives you to control your amp, effects, cabinet, microphone placement, etc. is fantastic.
Guitar Rig 6 by Native Instruments
Guitar Rig 5 was an incredibly popular program that has always been in close competition with AmpliTube. You’re likely to hear other guitarists talk about it online as many guitarists still use it today.
Guitar Rig 6 was finally released in late 2020 after many years of waiting. If you’re interested in experimenting with a wide range of effects and tones, Guitar Rig 6 is one of the best choices.
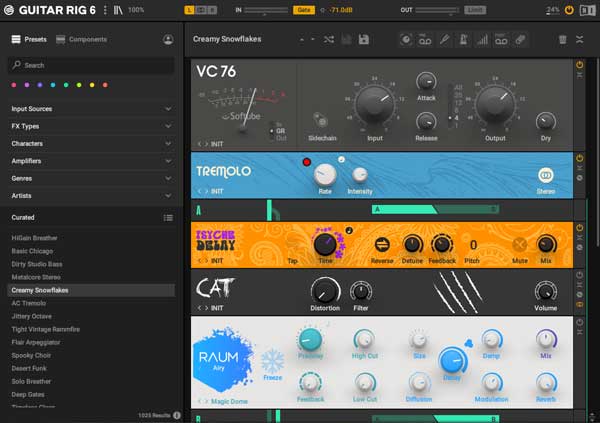
You can simulate authentic guitar tones just like the other options covered in this guide, but Guitar Rig 6 really shines when you use it for ambient and experimental effects.
Check out my review and tutorial of Guitar Rig 6 here.
Verdict: Recommended for guitarists who want to take things further than basic guitar amp tones. The routing options possible in Guitar Rig 6 put it far ahead of other options.
BIAS FX by Positive Grid
When the first BIAS FX released it blew people away with its incredible tones. The BIAS AMP software allowed you to dig deep into an amp model’s components and tweak it to a level no other software came close to.
BIAS FX 2 is now available and as you might expect, it surpasses the original BIAS FX in terms of quality.
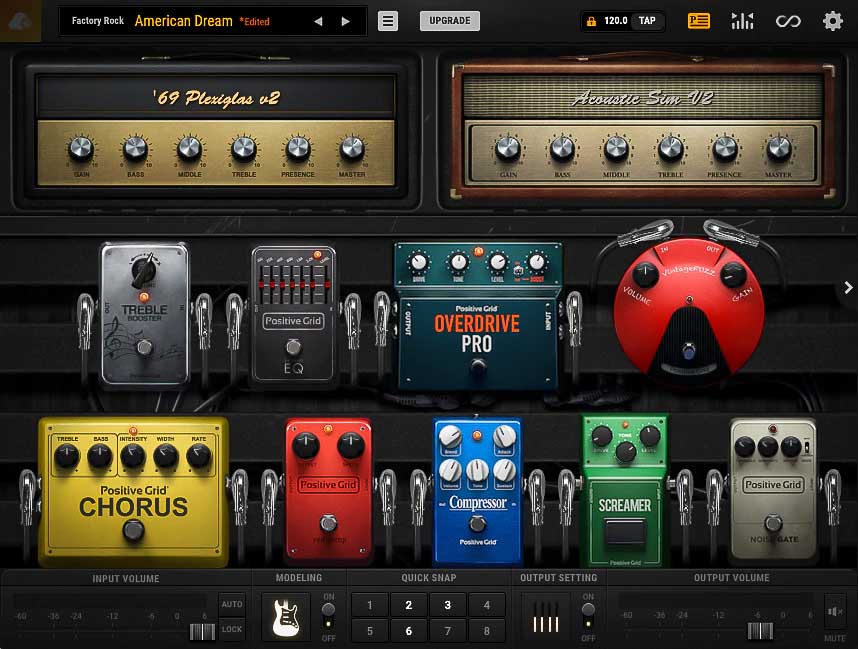
As you can see, BIAS FX 2 is simple to use as it focuses on displaying effects and amps with life-like images of the actual pedals and amps. If you know popular guitar pedals, there’s no doubt what the green ‘screamer’ pedal is based on or the round red fuzz pedal.
If you’re looking for a high-quality substitute for a real guitar amp, then using BIAS FX 2 is possibly the best choice.
It can run as a standalone program or as a plugin in a DAW. So you can use your computer as a guitar amp with the standalone program and if you want to record any parts, you can open BIAS FX 2 within any DAW.
Verdict: Highly recommended. Incredibly quality tones in an easy to use interface.
Helix Native by Line 6
Helix Native is a plugin based on the modeling software that made the Helix pedals so well-known.
It includes everything you would expect from a Helix plugin such as amp models, effects models, IRs (find out about Impulse Responses here) and more.
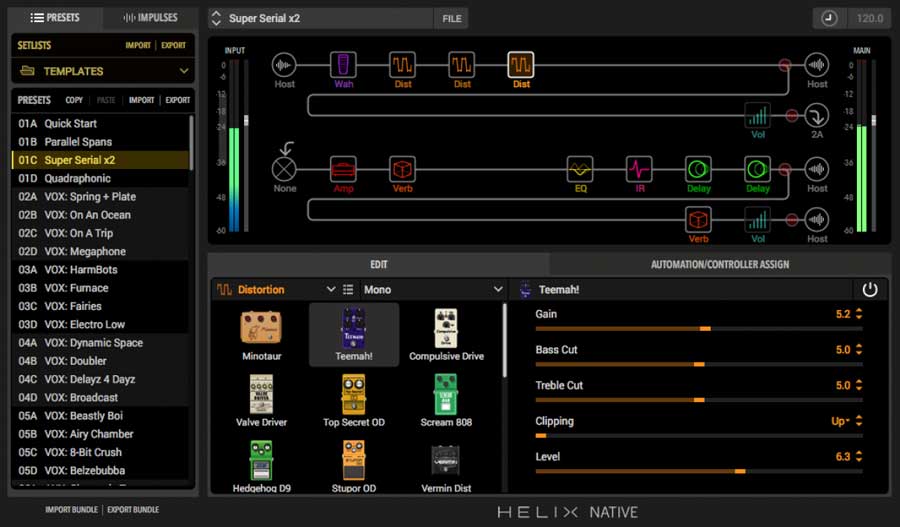
As you can see from the above screenshot, Line 6 has taken a very different visual approach compared to other programs in this guide. The layout matches the display you see on the Helix floorboard rather than attempting to look like real pedals and amps.
This can take some time to get used to as you need to get used to moving sliders instead of tweaking knobs, but it is easy to use.
The downside of Helix Native is that it does not run as a standalone. You can only use it as a plugin inside a DAW. So if you want to use your computer as a guitar amp, you would need to also have a DAW to run Helix Native.
Verdict: Moderately recommended. The lack of a standalone version makes this unnecessarily limited and requires you to use a DAW. While the quality of the effects and tones is fantastic, the interface is a bit odd and isn’t as easy to use as BIAS FX or Guitar Rig 6. Helix Native is significantly more expensive than BIAS FX 2 but for some guitarists, the extra price might be worth it.
Check out more guitar plugins in this guide.
How to Control Your Effects and Tones
With a typical guitar and amp rig, you’re able to change between amp channels or effects with stompboxes and foot controllers.
If you want to control your guitar effects and tones when you run your rig through a PC, you can get the same control with a MIDI foot controllers.
A MIDI foot controller simply plugs into your PC. In your DAW, you can set the foot controller to control almost anything you would want.
Here are some examples of what you can set your foot controller to control:
- Change amp tones or presets
- Toggle individual effects on and off
- Use an expression pedal for wah, volume, or whammy effects
- Use an expression pedal to dynamically change any effect preset (eg: change the delay length, gain level, chorus depth, etc.)
- Set a footswitch to start recording or start playback of a backing track
- Trigger samples or any other plugins
Being able to control any aspect of your tone and effects with your feet adds so much to a guitar & PC rig. You’re able to do things that most traditional guitar rigs aren’t capable of.
There are many different foot controllers available, so check out this Guide to the Best MIDI Foot Controllers for Guitar.
Getting Great Tones on Your Computer
Great guitar tones are possible using any of the software options mentioned above. If you know how to dial in the right settings, you’re able to produce professional-quality recordings from home with minimal equipment.
If you’re interested in learning how to record your guitar from home, check out this guide. It explains everything from gear and software in great detail.
If you’re interested in recording guitar videos for YouTube, check out this guide. The guide will also cover recording videos along with tips and advice on getting the best results.
If you simply want to use your computer as an amp, you’ll get the best tones when you know how to dial in the perfect settings for any modeled amp or effects pedal. Read through this guide on Guitar Amp Settings to learn everything you need to know about amp settings before you start looking up different presets. It’s possibly the most important and popular guide I’ve ever written.
My Guitar Effects Course walks you through all the types of effects you will find in a program like AmpliTube or BIAS FX, explains how to use each type of effect as well as how to think about different types of tones.
The course is designed to teach you the principles of good tone and how to think about tone. If you’re wanting to learn about guitar effects and how to dial in different tones, check the course out.