
In this guide, you will learn how to record guitar in Audacity with step-by-step instructions.
While I highly recommend using a proper DAW (Digital Audio Workstation) to record guitar, Audacity is a free and easy audio editing program and a good starting point for getting into recording guitar.
This step-by-step tutorial only covers the basics so I highly recommend you check out my Ultimate Guide to Recording Guitar at Home for a complete breakdown of everything you need to know about recording guitar.
To record guitar in Audacity, all you need is an audio interface or USB microphone. Set Audacity to use the proper input and output, then you’ll be ready to record your guitar.
Let’s go through all of the steps to record guitar in Audacity.
Step 1: Install or Update Audacity
Start by downloading and installing Audacity here.
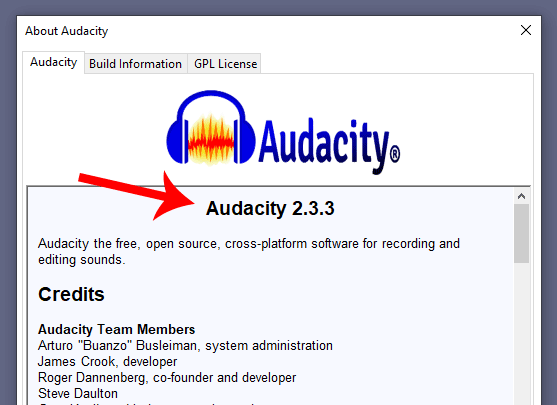
If you already have Audacity, check to make sure it is the latest version (version 2.3.3 as at April 2020).
Check your current Audacity version by going Help > About Audacity.
Then go Help > Check for Updates to see what the current version is on the Audacity website.
If you have an older version, you’ll need to download the latest version from the Audacity website to update.
Once Audacity is installed and you have the latest version, you can continue to the next step.
Step 2: Connect Audio Interface or Microphone
You have two ways to record a guitar in Audacity. You can use an audio interface or a microphone.
If you don’t have a microphone or audio interface, learn about the different recording options in this guide.
In this example, I’m using an iRig HD 2 (check out my review to see why I highly recommend it for electric guitar) and plugging it into my PC’s USB port.
One of the most popular audio interfaces I recommend if you want to record acoustic or electric guitar (or vocals and other instruments) is the Focusrite Scarlett range (link to Amazon for details and different options).
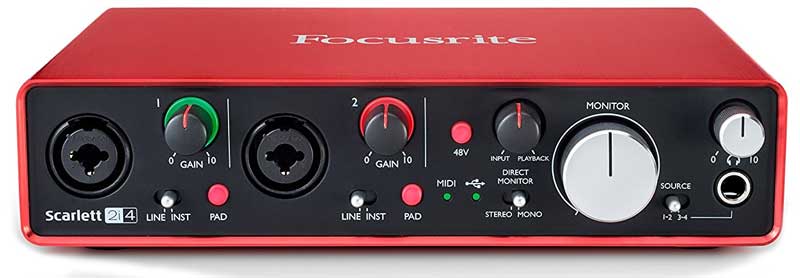
To record guitar using a Focusrite audio interface, simply plug it into your USB port before you open Audacity.
An audio interface like the Focusrite Scarlett is the ideal option if you want to record an acoustic guitar using a microphone.
Alternatively, if you want to record your guitar (or guitar amp) with a microphone, you can buy a USB microphone like this one.

When I’m recording vocals, instead of using an audio interface, I simply plug in my iRig Mic Studio (link to review). A USB microphone like this provides a simple setup.
But for most people, I highly recommend using an audio interface as it gives you far more flexibility. You can plug any microphone or multiple microphones into an audio interface.
Step 3: Set Up Audacity
Once you have your microphone or audio interface connected to your computer, open Audacity.
You’ll see a screen similar to this (may look different depending on the version and the color theme you choose):

The first thing to do before you start recording is to set up the audio input and output.
On the top right of the screen, you’ll see these options to set up the audio input and output:
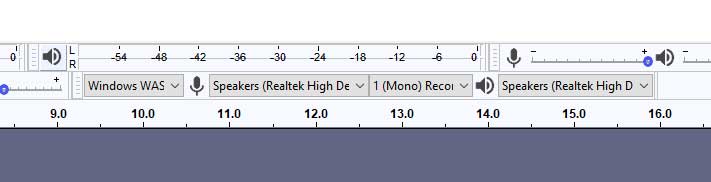
This is where you can select the input from your audio interface and what speakers to play the output through.
Select Audio Input
Select the dropdown next to the microphone icon to bring up the different input options:
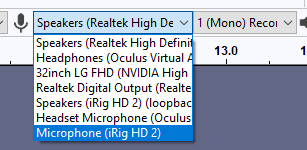
Tip: to make it easier to read the options, click and drag the right end of the panel to stretch it out as shown below:

You can see from the above options that the iRig HD 2 I have connected has a ‘microphone’ option. I’ve selected that to use for recording.
Select the option that matches the input from your audio interface or USB microphone.
Wondering why options like speakers and headphones show up in the inputs?
These options give you a way of recording any audio playing on those speakers/headphones.
This is called ‘loopback’ and can be very handy.
I won’t cover loopback in this guide, but keep it in mind if you ever want to record audio playing on your computer.
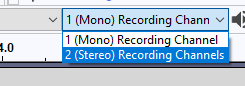
Select Channels
Once you select your audio interface from the inputs, you can choose whether to record mono or stereo in the next dropdown:
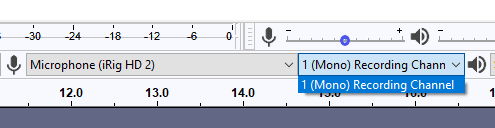
The iRig only has one recording channel, so it only shows the option for mono.
If your audio interface has multiple audio inputs such as the Focusrite Scarlett, you can select stereo if you need to record multiple inputs at once.
If you do need to record multiple inputs at once (eg: guitar and vocals), I explain later in this guide how to do this properly.
Select Audio Output
Finally, to be able to hear the audio properly, you need to select the audio output using the dropdown next to the speaker icon.
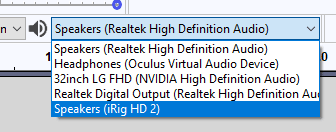
You will likely have a few options here.
The easiest option is to select your computer’s audio output so you can hear the audio playback through your speakers as normal.
Alternatively, you can plug speakers or headphones into your audio interface. If you want to do this, make sure you select your audio interface’s output or else it won’t work.
You can see from the above screenshot that I’ve selected ‘Speakers (iRig HD 2)’ to be able to plug headphones into the iRig and hear what I’m recording.
An alternative to using the inputs and outputs panel is to go to the Preferences menu.
Go Edit > Preferences (or Ctrl+P) and select Devices:

This shows all of the important options as well as some latency settings.
If you are getting latency before or during recording, try changing the buffer length setting to zero. This forces Audacity to record using an absolute reading.
If this doesn’t work, try different settings lower or higher than 100 milliseconds. The lower the buffer length, the lower the latency. But lowering the buffer length also increases CPU usage, so try a few different values to see what works best for your system.
Once you have configured your audio inputs and outputs (you can easily change any of them at any time), you’re ready to start recording.
Step 4: Check Audio Levels
Before you start recording, you need to make sure the audio levels are set properly.
Having poorly set up audio levels can easily ruin your recordings.
At the top of the screen, you’ll see two sections where you can see the audio levels for the inputs and outputs:

I’ve highlighted the input level in green and the output level in blue (notice the icons).
To check your recording level, click the ‘Click to Start Monitoring’ text on the input panel.

You should see a green bar appear to match the level of your input.
If you don’t see a green bar appear, you may need to try using a different audio host (eg: MME or Windows WASAPI) or check that the correct input channels are selected.
The closer the bar reaches ‘0’ on the right, the stronger the input signal is.
If your guitar is plugged in or your microphone is switched on, play something and watch the levels.
Raise the input level on your audio interface until the level is consistently above -12 but still less than 0.
Seeing yellow in the bar (as shown above) is fine and probably a good place to be.
If your bar shows red as shown below, that’s too high.

If your input level ever reaches or exceeds 0 dB, it will clip.
Clipping is when the audio distorts (not in a good way) and will completely ruin your recording.
Don’t let your input level ever reach 0 dB. Lower the input level on your audio interface to keep it well under 0 dB while you play.
The below screenshot shows what happens when you record with the input level set too high:
You can see the above monitoring bar is maxed out and the blue waveform completely fills the screen.
Once your input level is set to a good level, we can start recording.
Step 5: Record Guitar
Recording guitar is easy in Audacity. Once you have correctly configured the audio inputs and outputs, you simply hit the big record button or press ‘R’ on your keyboard:
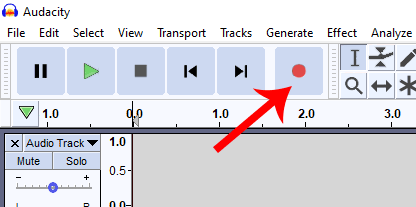
Audacity will automatically create a new track (mono or stereo depending on what you chose in the previous step) and start recording.
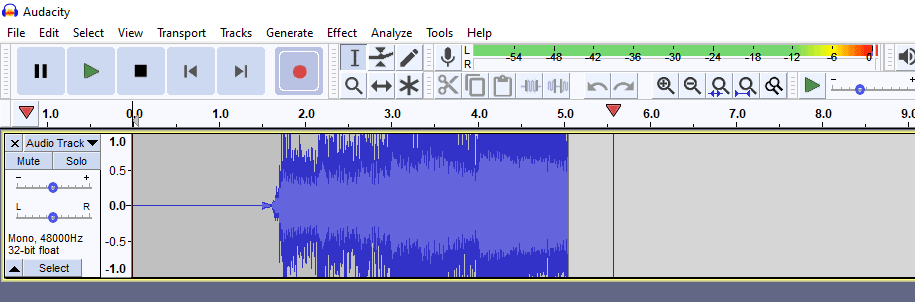
You will see the new track appear and the recorded track appear in the timeline as shown below:
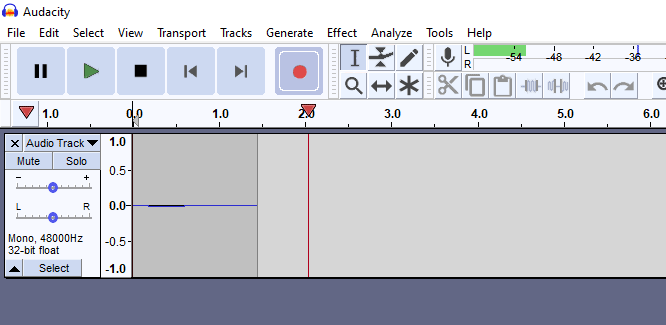
As you start to play, you should see the waveform appear on the track.
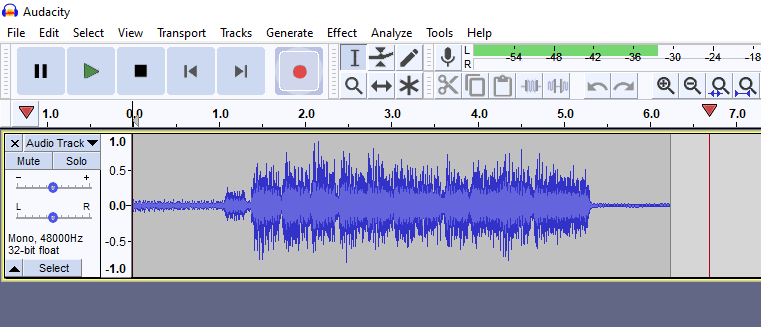
You can see from the above screenshot that the waveform isn’t maxed out because the input levels are set properly.
This is what you are aiming for. If the waveform looks tiny, it means a weak signal.
Once you finish recording, press the stop button (space bar).
You can now click the play button to listen back to your recording.
Adjust the output volume level using the slider as shown below:

I don’t recommend adjusting the input level slider as you should be controlling the input levels on your audio interface.
The goal is to have a loud input signal without it distorting.
Dealing with Errors
Once you choose your audio inputs and outputs, there is a chance you may get an error message when you click the record button.
Here is an example of an error you may see after pressing record:
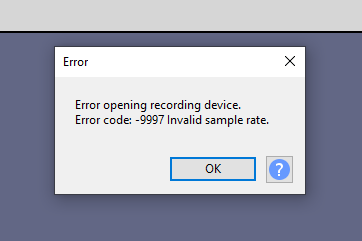
With any error message, you can click the ‘?’ button to bring up the Audacity manual for helpful advice.
This specific error is when the sample rate of the hardware and software aren’t matching.
Some audio interfaces only work in certain sample rates, while others will work with pretty much anything.
Check your project’s sample rate on the bottom left of your screen:
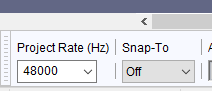
Make sure this rate matches a sample rate your audio interface is compatible with.
Most audio interfaces are compatible with 44.1kHz, 48kHz, and some 96kHz or higher.
48kHz is perfectly fine for most situations.
How to Use Guitar Effects and Plugins in Audacity
Once you get the hang of recording guitar in Audacity, you might want to start experimenting with effects or amp simulations.
The good news is that Audacity is compatible with many of the plugins you would use in any DAW.
Important: Audacity is only compatible with 32-bit plugins. There is a workaround that I will cover in a future guide.
Unlike DAWs that can automatically find plugins on your computer, Audacity cannot.
To use effects and plugins in Audacity, you need to copy the plugin files to Audacity’s plugins folder.
To see where you need to copy your plugin files, go to Tools > Add / Remove Plug-ins. This brings up the plugins manager:
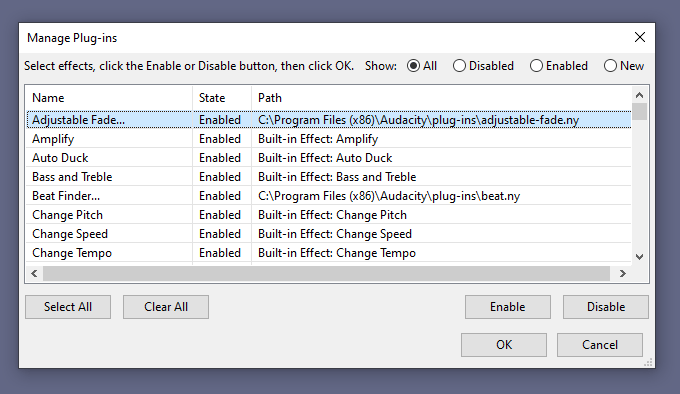
From here, you can enable or disable any plugins as needed.
You can also see the directory for the plugin. In the above screenshot, you can see that I need to copy any plugins into the C:\Program Files (x86)\Audacity\Plug-Ins folder.
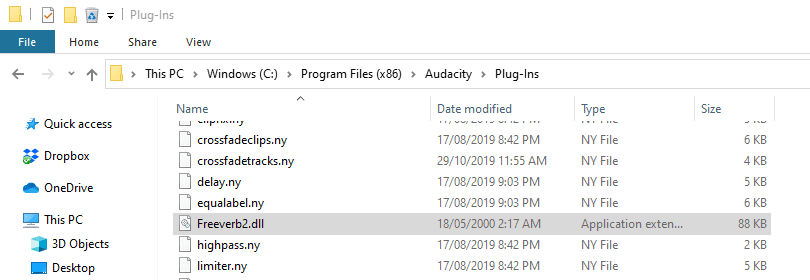
Copy any plugin files to this folder so Audacity can find them. I’ve copied the plugin file for a free reverb plugin (freeverb2.dll) into the folder:
Once the plugin files have been copied into the folder, you need to close and reopen Audacity so it can scan for new files.
Open the Plugin manager again and you’ll see the new plugins in the list:
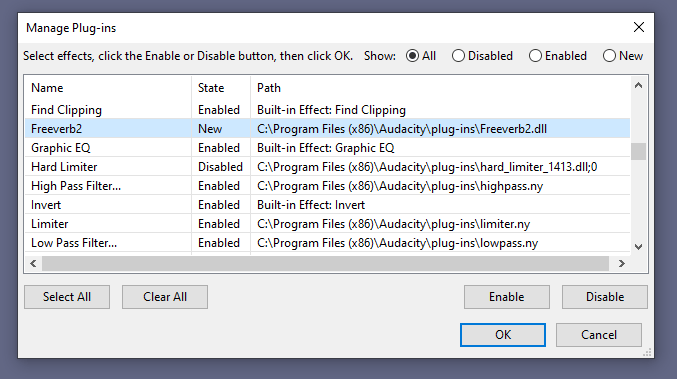
You can see that the ‘freeverb2’ plugin has been recognized.
Click the ‘Enable’ button for any new plugins and they will appear in the Effects menu.
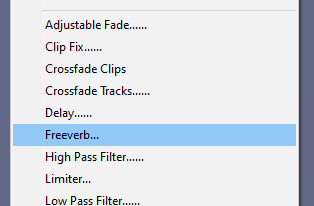
You can now apply any plugin to the track as you like.
If you get an error message, check that you copied across the 32-bit plugin files and not the 64-bit files.
How to Record Multiple Inputs at Once
Recording one instrument at a time is simple with Audacity. But what if you want to record vocals and guitar at the same time?
The way to record multiple instruments at the same time in Audacity is to use an audio interface with multiple inputs.
In the below photo of a Focusrite Scarlett 2i4, you can see there are two different inputs on the front:
This means you can plug a guitar in one input and a microphone in the other input (or any combination of instruments and microphones).
Keep in mind that even if you have a device that has more than two inputs, Audacity will only recognize the first two input channels.
To record two inputs at once in Audacity, you need to set the input to stereo as shown below:
All this means is that Audacity with record both input channels from your audio interface.
When you hit record, you will see Audacity create a stereo track with two separate waveforms. You will also see two input level indicators showing the level for each input.
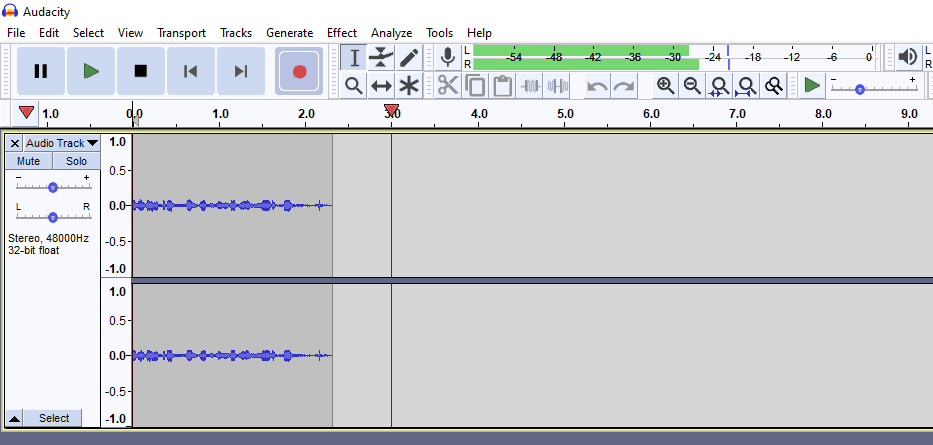
The left audio channel will be from one input and the right channel will be from the other input.
Once you finish recording, you will probably want to separate the tracks.
To split the stereo track into two separate mono tracks, click the arrow on the far left of the track:
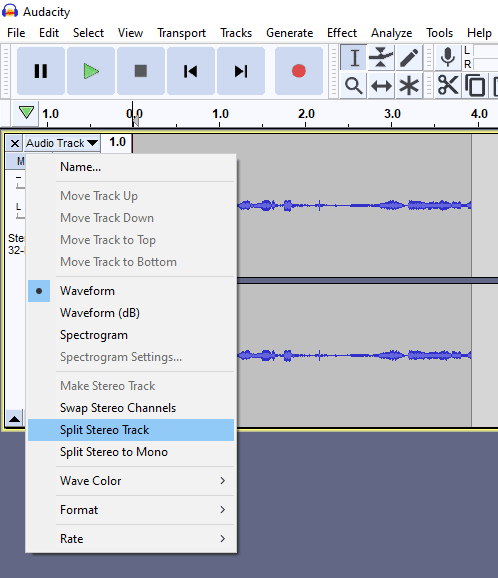
Select ‘Split Stereo Track’ and you will see that the stereo track is now separated into two different tracks.
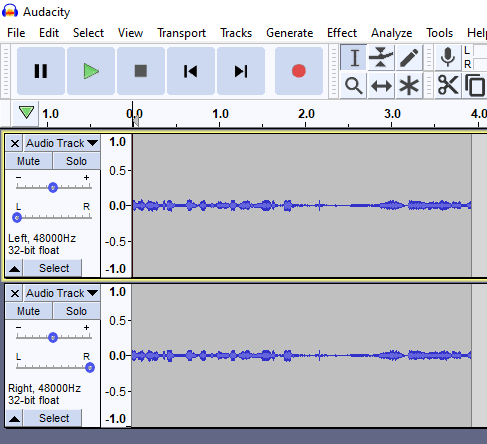
Splitting the tracks like this makes it easy to edit each track as you like.
You can now rename each track, apply effects to individual tracks, mute them or anything else you want.
If you plan on recording multiple tracks at once, I highly recommend using a DAW instead of Audacity.
Audacity is great for simple recording needs, but a DAW will be better in every way when you have more complex recording needs.
How to Record Guitar in Audacity Summary
Here are the steps to recording guitar in Audacity:
- Plug in an audio interface or USB microphone
- Open Audacity and select the proper inputs and outputs
- Press ‘R’ to start recording your guitar
- To record a new track, select ‘Tracks > Add New’, then press record
You can record as many tracks as you want and can easily mute or solo each individual track as needed.
Audacity works best for simple recordings, so if you want to record full songs or multiple instruments, I recommend using a proper DAW.
Find out how useful a proper DAW is in my Ultimate Guide to Recording Guitar.
Recording Guitar in Audacity FAQ
Here are some common questions you may have about recording guitar in Audacity.
Is Audacity Good for Recording Guitar?
Audacity is good for recording guitar when you have simple recording needs. If you only need to record one track at a time, Audacity is a quick and easy way to record your guitar.
The more complicated your recording or mixing needs, the more useful a DAW will become. Use Audacity for simple recordings and a DAW for bigger projects.
How Can I Hear Myself While Recording in Audacity?
You can turn on audio monitoring when recording in the preferences menu. This will allow you to hear yourself while recording. Go to Edit > Preferences, then select Recording and check the box next to ‘Software playthrough of input’.
How do I Record from USB With Audacity?
To record from USB with Audacity, all you need to do is select the USB device in the audio input section. Select the input device dropdown menu and choose your USB recording device to use it during recording.
How do I Get Audacity to Recognize an Interface?
To get Audacity to recognize an interface, you need to restart Audacity after plugging it in. If Audacity doesn’t recognize your audio interface, try changing between different interface host options in the Preferences menu.
Some older audio interfaces may not be compatible with Audacity, but most should work with the right host interface.
Why Isn’t Audacity Picking Up My Microphone?
If Audacity isn’t picking up your microphone, first check to make sure it is selected in the audio inputs section. If it is selected, click the recording meter to start monitoring. Check the levels of the microphone to see if it changes the meter output.
If your microphone isn’t picking up anything, make sure you have it plugged in the right port. Test it on a different device to make sure it isn’t broken.
Also try changing the audio host to see if that makes a difference. Switch between MME and Windows WASAPI to rule out any audio host issues.
What is MME in Audacity?
MME in Audacity is an audio driver used in Windows and stands for Multimedia Extension. Most audio interfaces should work with MME, but you may want to use Windows WASAPI for better compatibility with newer devices.
I suggest trying both MME and Windows WASAPI out so you can see if one performs better than the other with your system.
How Do I Fix Latency in Audacity?
You can adjust the settings to fix latency issues in the preferences menu under devices. Adjust the buffer length setting to change the latency you hear. The lower this number, the lower the latency. Keep in mind that lowering the buffer length also increases CPU usage, so you may hear glitches and issues if you set it too low.
You can also try changing the buffer length setting to zero. This forces Audacity to record using an absolute reading. If this doesn’t work, try different settings lower or higher than 100 milliseconds.
How Can I Record in Audacity While a Track is Playing?
You can record over another track in Audacity by adding a new track. For example if you want to record over a backing track, import the backing track to Audacity. Then create a new track and hit record. You will hear the backing track play while the new track records.
How do I Record Acoustic Guitar in Audacity?
You can record acoustic guitar in Audacity using either a microphone or an audio interface. Many acoustic guitarists will record multiple microphones at once, which can be done with an audio interface in Audacity.
Read the section earlier on recording multiple input devices at once if you want to record your acoustic guitar with more than one microphone at once.
Now that you understand the basics of recording guitar in Audacity, check out these guides to learn more:
- Ultimate Guide to Recording Guitar at Home – covers everything you need to know about recording
- Recording Your First Song – a tutorial to show one possible way of recording a full song
- How to Record Guitar Videos for YouTube – everything you need to know to get started with creating videos for YouTube
Recording your guitar can be a lot of fun, so take your time learning the basics and read the above guides to learn more.