
VST plugins can give you access to great guitar effects, amp tones, and more as covered in my Ultimate Guide to Guitar Plugins.
But what if you want to run a plugin outside of your recording program (DAW)?
Sometimes you might want to use a plugin’s effects, but you don’t need to use a DAW. While some plugins come with their own standalone versions, many only work when added inside of a DAW.
In this guide, I’ll explain how you can run any VST plugin as standalone without a DAW.
I’ll also give a specific example of how to run Line 6 Helix Native as a standalone application (something a lot of guitarists want to know).
If you want to learn how to use plugins in a DAW, check out these tutorials.
How to Run a VST Plugin as Standalone
Let’s look at the different ways you can run a VST plugin as standalone.
Does the Plugin Come With a Standalone Version?
Before you do anything to run a plugin as a standalone, first check to make sure that the plugin doesn’t already come with a standalone version.
Run a search in your programs to make sure there isn’t already a standalone program you can use.
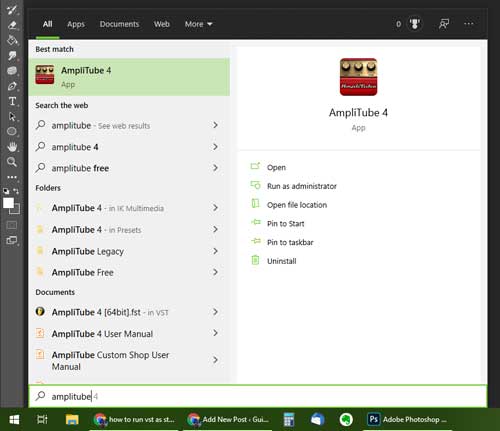
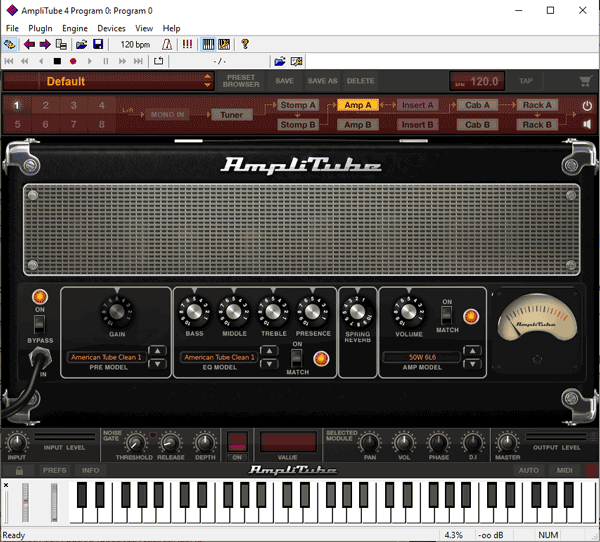
In the above example, you can see that when I search for AmpliTube, Windows has found the standalone version that AmpliTube 4 comes with when I installed the plugin.
If you see a result when you search for your plugin, run it to use your plugin as standalone.
If you don’t find a standalone version, it could be that it wasn’t installed when you installed the plugin.
Check the plugin’s website to double-check that it does come with a standalone version.
I’ve had quite a few people email me over the years only to find out that they mistakenly unchecked the box during installation for a standalone version.
If the plugin’s website says that it comes with a standalone version, simply reinstall the plugin and make sure you check the box to install the standalone version.
Using a VST Host
If your plugin doesn’t come with a standalone version, there is a way around this. It is possible to run a VST plugin as standalone without using a DAW.
The easiest way is to use something called a VST host. A VST host is a lightweight program with the sole purpose of running the VST.
VST hosts don’t have any recording or mixing capabilities and are only meant to run plugins as standalone versions.
There are a few different VST hosts available, so let’s go through the most popular options so you can see how to run any VST plugin as standalone.
How to Use VSTHost (VSTHost Tutorial)
VSTHost is the most well-known VST host program for Windows and works extremely well.
If you only want to run one plugin, you may prefer SAVIHost (covered later). If you might want to run multiple plugins at once or you want to jump between different plugins, then VSTHost is definitely the best choice.
Here’s how to install and set up VSTHost.
Step 1: Download VSTHost
Go to the VSTHost website as scroll down to downloads.
You’ll see a few different versions for different versions of Windows.
The key point is that you should download a version that is compatible with your computer. Unless you’re using an ancient PC or you only want to run 32-bit plugins, I recommend downloading the 64-bit version of VSTHost (vsthostx64.zip).
All of the versions work with both 32 and 64-bit plugins. The only difference is how the plugins are processed.
Step 2: Install VSTHost
Once you have downloaded the right version of VSTHost, you should have a zip file.
Create a folder somewhere you will remember (I created mine inside my plugins directory) and copy all the files in that folder.
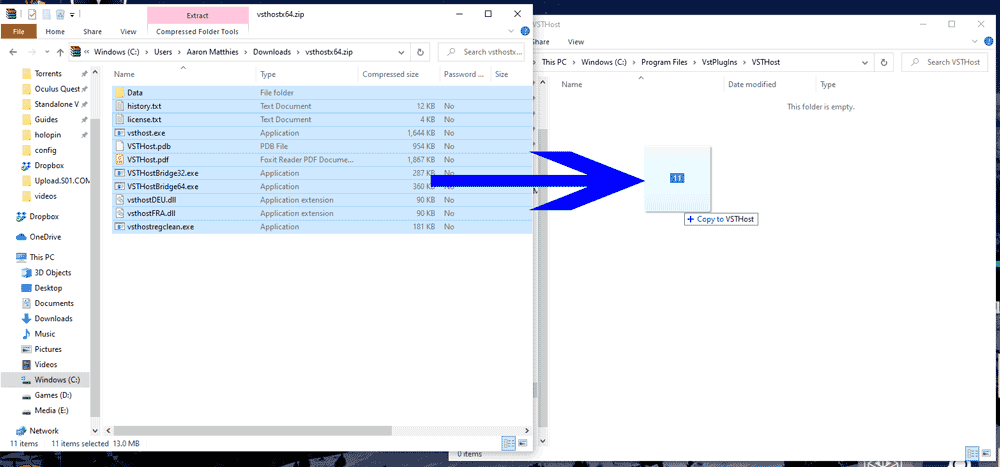
Once you have all of the files installed, I recommend creating a shortcut to vsthost.exe either on your Desktop or in the Start Menu area so you can quickly open it whenever you want.
Step 3: Set Up VSTHost Audio Settings
Open vsthost.exe and let it load.
Go to Devices > Wave to set up your audio interface.
Remember that VSTHost needs to connect to your audio interface just like a DAW, so you need to have appropriate audio drivers set up to use it properly.
If you don’t know if your audio drivers are set up properly, read the first steps in this tutorial to set them up properly. Read the section on ASIO4ALL if your audio interface doesn’t come with a driver.
Select the Output Port dropdown menu and select an appropriate driver.

In the above screenshot, you can see that while I have a few options, I’ve selected ASIO4ALL because it gives me the best performance for my audio interface (iRig HD 2).
You don’t need to worry about the Input Port option when you select an ASIO device from the Output Port menu.
Set the sample rate to match what your audio interface is compatible with (usually 44.1kHz or 48kHz) and select OK.
If you select an ASIO device, you will now see two extra menu options under the Devices menu:

This is where you can configure your audio interface to make sure it properly connects to your guitar input.
Use the ASIO Channel Selection option to make sure your guitar input is enabled and the correct outputs are enabled.
Check the ASIO Control Panel option to make sure your interface is working properly.
Step 4: Find Your Plugins
Now you can configure VSTHost to find your plugins.
Go to File > Set Plugin Path and add any folders where you have plugins installed.
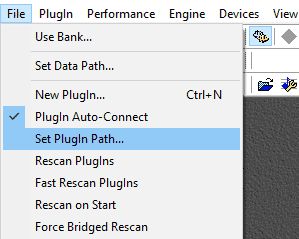
Click the bottom right button with the three dots to add a directory to the list:

The above two folders are the most likely places to look for your plugins, but it depends on any DAWs you have and where your plugin installers chose as the default directory.
Once you have all of your plugin paths added to the list, click OK.
VSTHost will scan for all the plugins (you’ll see the scanning on the bottom of the screen. The scan will be slow, so if you have a lot of plugins, expect to wait a while.
Step 5: Load Plugins
Once the scanning finishes (should show Ready on the bottom bar), you can load any plugin you want by going to File > Plugins.

Select any plugin and you’ll see something like this:
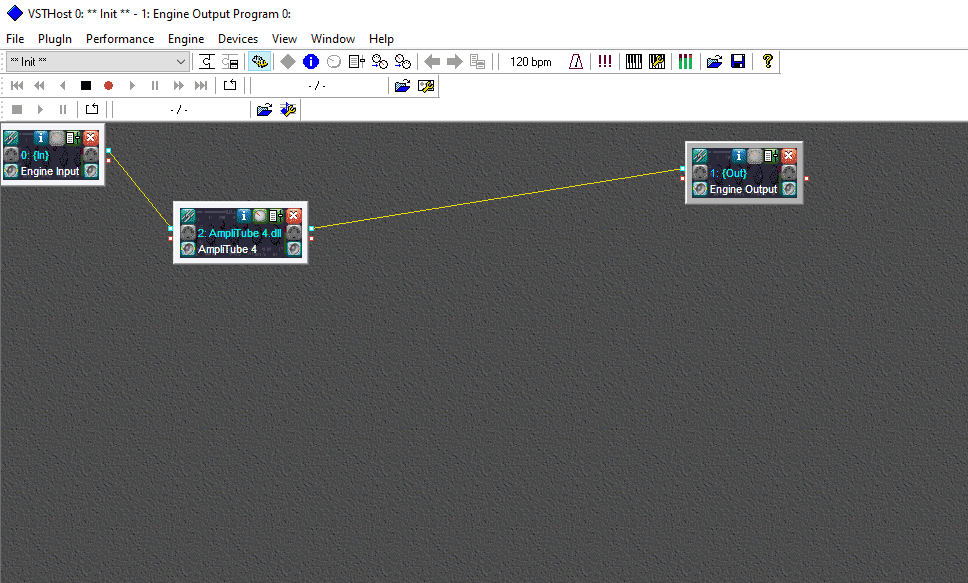
Think of this as your virtual guitar rig. The box on the left is your guitar signal and the box on the far right is your speaker output.
Anything between those two boxes are where you can load plugins (you can load more than one plugin in VSTHost).
You can drag any of these boxes around as you like, which can be handy if you load multiple plugins and chain them together.
There are a lot of features here, but the grey circle on the green button is the main option you want to open and edit the plugin.

Click the button and you’ll see the plugin window open up:
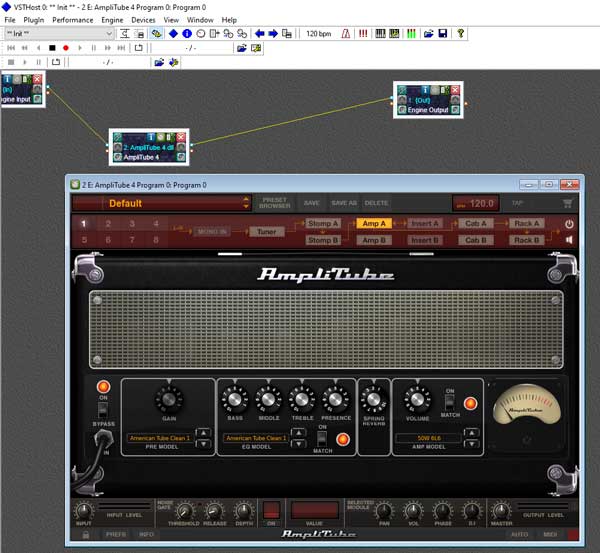
You can now edit the plugin as you like and drag the window around (handy if you run multiple plugins at once).
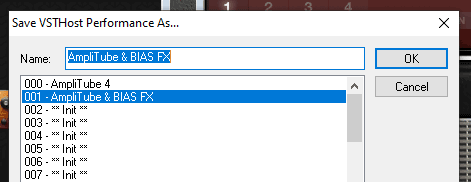
At this point, I recommend saving the ‘Performance’ (what VSTHost calls the current plugin setup) so you can easily bring up this setup at any time.
Go to Performance > Save As and rename it to whatever you want.

This is a handy feature if you ever want to set up different rigs or combinations of plugins.
If I ever want to load AmpliTube 4 on its own, I simply select it from the dropdown menu.
If I want to run AmpliTube along with another plugin, I simply load all the plugins and save the performance in an available slot.
In the below screenshot, you can see that I’ve loaded both BIAS FX and AmpliTube 4 and chained them together.
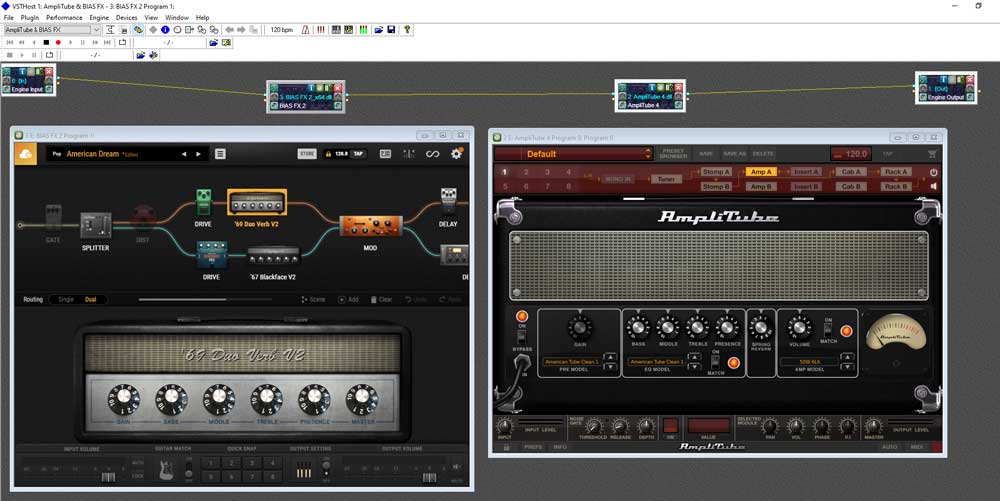
To do this, simply add your second plugin, then double click the blue squares on the input and output of each box or the yellow lines to reroute the signal as you want.
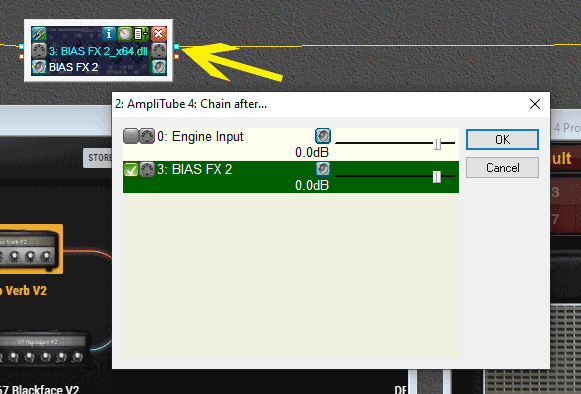
In the above screenshot, you can see that I have connected BIAS FX 2 to AmpliTube 4 (the green checkbox).
Save any new plugin layouts as a new performance slot to be able to easily switch between plugins.
VSTHost may feel a bit strange to use at first, but once you get the hang of chaining the plugins together, you’ll see how useful it can be as a standalone program.
Using a MIDI Foot Controller With VSTHost
A powerful feature included in VSTHost is the ability to use MIDI hardware.
This is great if you use MIDI keyboards, but also handy as guitarists if you want to use a MIDI foot controller.
For example, you could connect a MIDI foot controller like the below example and use it to control any plugin preset or setting you want.
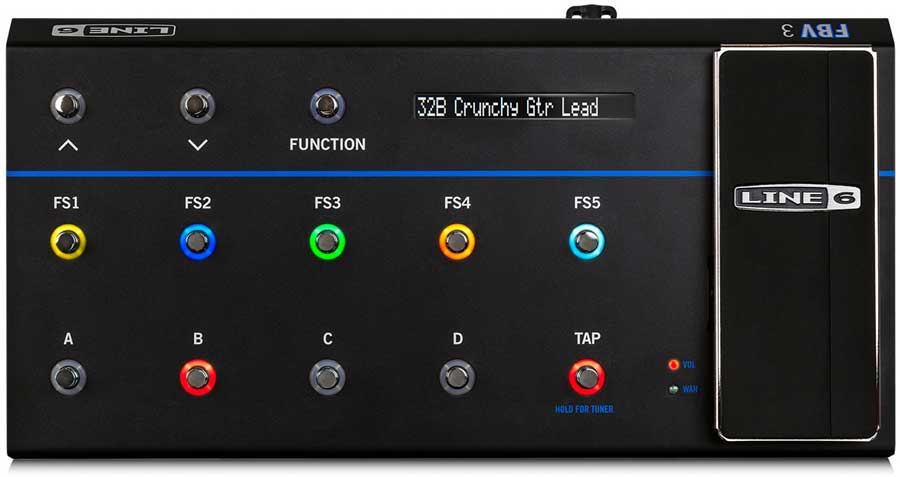
This is great if you want to use your PC as an amp to run all of your effects and amp tones (find out more about using your PC as an amp here).
You could use a MIDI foot controller, run a plugin such as AmpliTube, BIAS FX, or Line 6 Helix, and use the foot controller to switch between effects, use the wah, amp tones and more.
Find out more about MIDI foot controllers in this guide.
How to Use SAVIHost (SAVIHost Tutorial)
While VSTHost is fantastic, there may be times when you only need something simple to run a single plugin.
The idea behind SAVIHost is that it’s a simplified version of VSTHost that is meant to load one and only one VST plugin at a time in the simplest way possible.
Step 1: Download SAVIHost
Go to the SAVIHost website and download the version that matches the VST you want to run as a standalone.
For example, if you have a 64-bit VST2 plugin, download the savihostx64.zip file.
When you open the zip file, you’ll see a single exe file.
Open your plugins folder and find the file for your plugin. For this example, I’ll use SAVIHost to open AmpliTube 4 (although AmpliTube 4 already comes with a standalone version).
Copy the savihost.exe file from the zip into the folder where your plugin is located.

Step 2: Rename savihost.exe
Once the savihost.exe file has been copied to the folder that contains your plugin file, you need to rename the exe to match the plugin file’s name.
In this example, the plugin I want to use is ‘AmpliTube 4.dll’. So I need to rename savihost.exe to ‘Amplitube 4.exe’
The key point is that the savihost.exe must be renamed to perfectly match the name of the plugin’s dll file.

You can see that I’ve renamed the exe to match the plugin I want to use.
Once you rename the exe, you can open it and it will instantly load the plugin.
If it doesn’t load, it’s likely the plugin version (eg: VST2) doesn’t match the version of SAVIHost (eg: VST3). Try downloading the other version instead.
Tip: if you have multiple plugins you want to run as standalone, create a copy of the savihost.exe file and rename each one to each individual plugin.
Then all you need to do is open the appropriate exe file to run the different plugins.
I recommend creating a handy shortcut on your Desktop or start menu to quickly access plugins you regularly use.
Step 3: Configure SAVIHost
If SAVIHost opens and loads your plugin, you need to set up your audio device before you can start using it.
Go to Devices > Wave and select your audio device from the Output Port menu.

Follow the advice from the VSTHost section if you get stuck finding a device or you need to configure the audio inputs/outputs.
Once your audio device is set up properly, you can start using the plugin.
How to Run Line 6 Helix Native as Standalone
One of the best guitar plugins (check out the top guitar plugins here) for creating a complete guitar rig with effects and amp models is Helix Native by Line 6.
Line 6 Helix Native uses the same modeling technology used in their fantastic range of Helix pedals.
Unfortunately, Helix Native doesn’t come with a standalone version, so you normally need to run it as a plugin in a DAW.
But what if you want to use your computer as an amp and run Helix without messing around with a DAW?
You can easily run Helix Native as standalone using VSTHost or SAVIHost.
Use VSTHost if you want to use Helix Native in combination with other plugins.
Use SAVIHost if you want to run Helix Native standalone without any other plugin.
Here’s how to set up Helix Native as standalone using SAVIHost.
Step 1: Download SAVIHost
Go to the SAVIHost website and download the version for VST3 64-bit plugins (savihost3x64.zip).
Find where the Helix Native plugin is installed (default directory is: C:\Program Files\Common Files\VST3\Line 6) and copy the savihost.exe file to that directory.
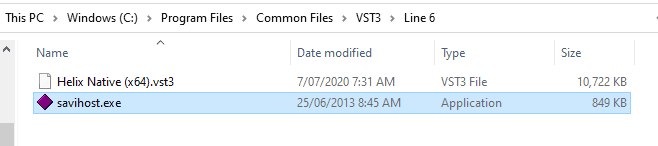
Step 2: Rename savihost.exe
Before you open the exe file, you need to rename it to perfectly match the vst3 file.
Rename the savihost.exe file to ‘Helix Native (x64).exe’.

I recommend creating a shortcut for this exe file so you can easily load Helix Native as standalone whenever you want.
The easiest way to do this is to right-click the file and select Pin to Start. You will see Helix Native appear on your start menu (Windows 10).
This means any time you want to run Helix Native as standalone, simply click that icon in your start menu.
Step 3: Configure SAVIHost
Open the renamed SAVIHost file and you should see Helix Native load:

After you sign in to your Line 6 account, you need to configure SAVIHost’s audio settings to hear your guitar.
Go to Devices > Wave and select your audio device from the Output Port menu.
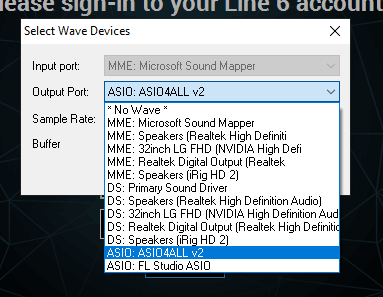
In this example, I’m using ASIO4ALL to connect my iRig HD 2 to my computer. You may have different audio devices appear on this list depending on what hardware you use.
Congratulations! You can now use Line 6 Helix Native as a standalone program as you like.
Tip: if you connect a MIDI foot controller to your computer, you can use it to control Helix Native.
In other words, you can connect a Line 6 floorboard to your computer and use it to control Helix for the fraction of the price of a Helix floorboard.
Find out more about MIDI foot controllers here.
Standalone Plugin FAQ
Here are some common questions you might have about running standalone plugins.
How Do I Run a VST Plugin?
There are two ways you can run a VST plugin. The first way you can run a VST plugin is by adding it to any DAW or VST-compatible recording program. The second way is to use a VST Host to run the plugin as a standalone application.
How you run a VST plugin depends on the type of DAW you are using. The general idea is that you install the plugin, open the DAW, then find the plugin in the DAW.
Find out how to add plugins in different DAWs in this guide.
If you want to run a VST plugin as standalone, follow the earlier steps in this guide using either VSTHost or SAVIHost.
What is a Standalone Plugin?
A standalone plugin is a plugin that allows you to open it outside of a DAW or recording program. Some plugins come with a standalone version while others don’t.
If your plugin comes with a standalone version, you will be able to load it at any time without needing to have a DAW.
If your plugin doesn’t come with a standalone version, use the above advice to run it as standalone or use a DAW to open it.
What is a VST Host Program?
A VST Host program allows you to open a VST plugin without needing to use a DAW (Digital Audio Workstation). VST Hosts such as VSTHost or SAVIHost allow you to open any VST plugin as standalone.
Where Do I Put VST Plugins?
You can install VST plugin files in any location. All you need to do is let your DAW know where to look for your plugins.
If you already have a DAW, you may already have some plugins installed in a default location. Open your DAW and find the plugin settings to see where the default plugin directories are.
The most common locations for VST plugins in Windows is in the following locations:
- C:\Program Files\VstPlugIns
- C:\Program Files\Common Files\VST3
- C:\Program Files (x86)\VstPlugins
It is best practice to install any new VST plugins in the same folder as your existing plugins.
Check out the tutorials in this guide to find where your plugins are installed.