
FL Studio comes with a lot of great plugins and effects, but you can also install third-party plugins in FL Studio to access new sounds, effects, and virtual instruments.
This guide will show you step-by-step how to install VST plugins into FL Studio, how to manage your plugins, and extra tips to make it easier for you to access and use your plugins.
Once you install some plugins, check out these guides to help you get more out of FL Studio:
- Ultimate Guide to Guitar VST Plugins
- Ultimate Guide to Drum VST Plugins
- How to Record Guitar in FL Studio
- How to Create Drum Tracks in a DAW
- Ultimate Guide to DAW Controllers (highly recommended for FL Studio users)
- Recording Guitar FAQs (ask your questions here)
Step 1: Downloading Plugins Compatible with FL Studio
There are a few different formats for plugins and you need to install the types that are compatible with FL Studio.
Make sure the plugins you want to install are compatible with FL Studio by checking the below information.
Plugin Bit Versions
VST Plugins can come in 32-bit or 64-bit versions.
If you’re using a 64-bit version of FL Studio (most people will be), try to install 64-bit plugins. 32-bit plugins will work, but the best practice is to match the plugin bit version to the bit version of your version of FL Studio.
Some plugins will automatically install both 32-bit and 64-bit plugins. That’s fine. FL Studio can combine the two versions so you don’t have them doubling up in your plugins list.
Check what version of FL Studio you’re running by going to the Help > About menu.
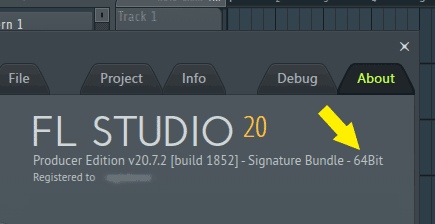
You’ll see either 32 bit or 64 bit on this screen.
Plugin Format
There are four different plugin formats you may find: VST, AU, AAX, RTAS. The different formats work with different DAWs.
FL Studio uses VST and VST3 format plugins. VST3 plugins are 64-bit and recommended if you have the choice.
Many plugin installers will ask you to choose which formats to install for the plugin as shown below:
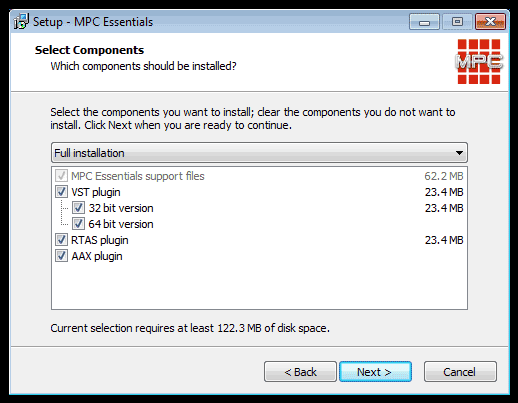
If you only use FL Studio and no other DAWs, you can uncheck the other formats and only install VST formats. If you also use other DAWs such as Ableton Live, you may want to install other formats as well as explained in my Guide on Guitar Plugins.
Downloading Plugins
When downloading most plugins, they will include an installer to help you install the plugin to the correct directory. Where to install the plugin is covered in the next step.
If you download a plugin and all you get is a .dll file, don’t panic. All you need to do is move/copy that file into the correct folder as covered in the next step.
If you download a plugin and it comes in a zip file, you need to open the zip file to either access the installer or find the .dll file.
All of this will make sense after the next step.
Step 2: Finding FL Studio’s Plugins Folders
FL Studio looks for plugins in specific folders by default. If a plugin isn’t installed in one of these folders, FL Studio won’t be able to use it.
Find out where your version of FL Studio looks for plugins by going to the Options > Manage Plugins menu.
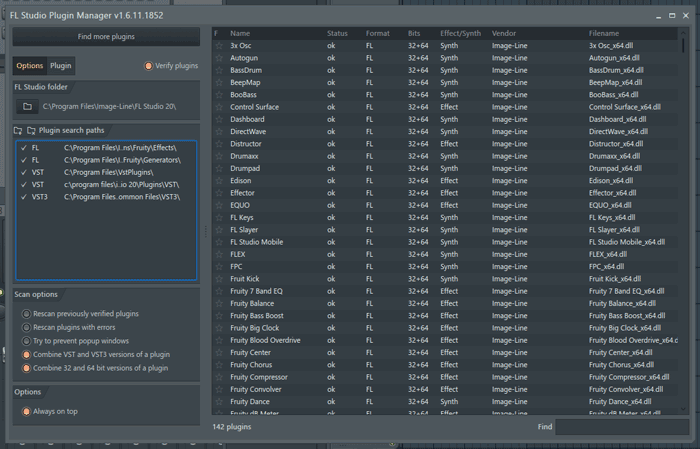
The above screenshot shows FL Studio’s Plugin Manager. This is where you can install, edit, and manage your plugins.
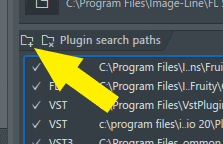
The directories shown on the left ‘Plugin search paths’ panel shows where FL Studio looks for plugins.
In the above screenshot, you can see that FL Studio looks for plugins in five different directories. The different directories are used for different types of plugins (eg: VST vs VST3) as well as FL Studio’s own plugins.
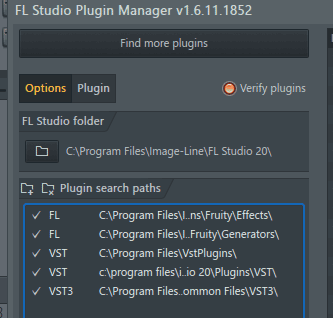
If you want to add a different directory to this list, click the folder + icon as shown below:
Select the directory you want to use for your plugins and it will be added to the list. If you have used other DAWs in the past, your plugins may be stored in folders created by the DAW. Adding those folders to FL Studio’s list is the easiest way to use those plugins.
Step 3: Installing Plugins to the Correct Folder
Now that you know where FL Studio looks for plugins, you can install your plugins to those folders.
In this example, I’ll show how to install one of the LePou Amps – a collection of free guitar amp simulator plugins covered in my guide on Best Guitar VST Plugins. You can follow these steps for any plugin.
First, download the plugin from the plugin’s website. This plugin gives you the option to download either Windows or Mac versions and choose between 32 and 64 bit. I’ll download the Windows 64-bit version.

Once you have downloaded your plugin, either run the installer (if it comes with one), or copy the plugin files to a folder FL Studio can scan.
The file I downloaded was a .zip file, so I need to open the file and extract the plugin file into my plugin folder, which was C:\Program Files\VstPlugins\ as shown in FL Studio’s plugin manager.
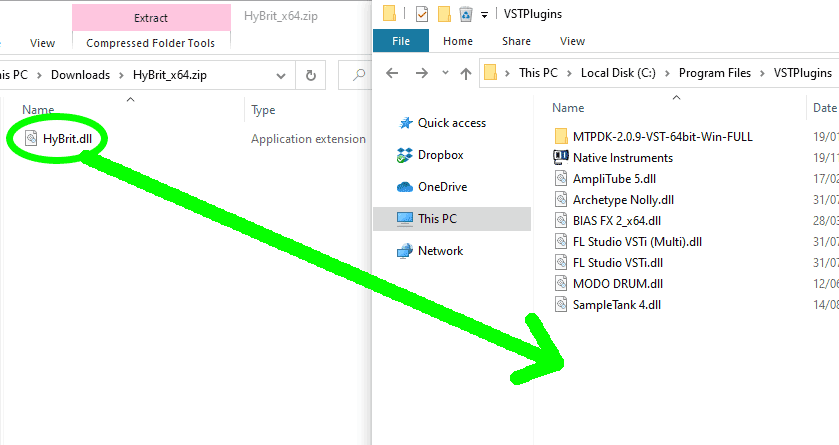
While the method you may follow may be different depending on what type of file you are given in the download, the end result should always be the same. There should always be some sort of file (eg: .dll or .vst3) installed in your plugins folder.
Step 4: Adding New Plugins to FL Studio
Once you have installed your plugin to one of the folders FL Studio can scan, open FL Studio.
Go to the Options > Manage Plugins menu.
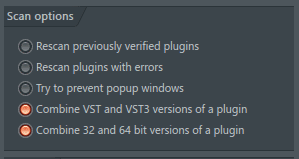
There are a few scan options you may want to enable/disable such as rescanning plugins that have had errors in the past or whether you want to combine 32-bit and 64-bit versions.
Click the Find More Plugins button at the top and FL Studio will scan the folders for any new plugins.
Once the scan has completed, scroll through your list to see if your plugin shows up.
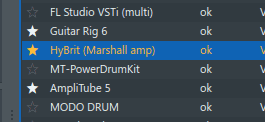
The below screenshot shows that the HyBrit plugin from LePou has been found and added to the list of plugins:
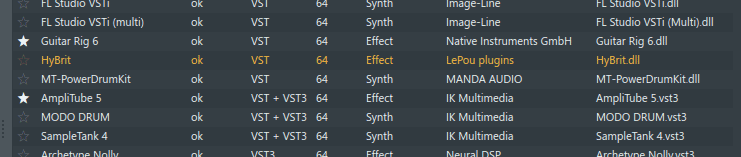
Sometimes the name shown on this list doesn’t perfectly match the actual plugin name. Use the search bar at the bottom or look at the filename column to find your new plugins.
If your plugin doesn’t show up after scanning, check that it is installed in the correct folder and you have installed the correct format (covered in step 1).
Step 5: Managing Your Plugins
If your new plugin shows up in this list, you can start using it straight away. But there are a few ways to make it easier to access and use your plugins.
Depending on the edition of FL Studio you buy, you might have a long list of plugins. This can make it awkward to quickly find your most-used plugins.
Here’s how you can organize your plugins for faster access.
Click on a plugin in the Plugin Manager and click the ‘Plugin’ tab on the left:
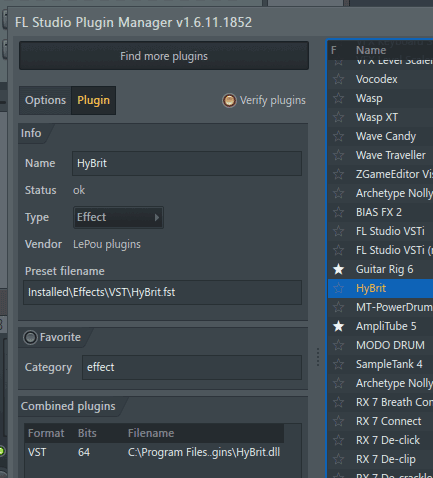
The left panel now shows all of the options and details for the selected plugin.
You can rename the plugin if you want to something that’s easier to remember or clearer on what the plugin is. For example, the ‘HyBrit’ plugin is based on a Marshall amp, so I’ll rename the plugin to ‘HyBrit (Marshall amp)’ so in the future I can easily find it.
Favoriting Plugins
Favoriting plugins is a great way to make it easier to find and add your most-used plugins to any project.
You can add any plugin to favorites in the Plugin Manager by clicking the start next to the plugin in the list.
At any time you can add or remove plugins from favorites to clean up your list.
When you go to add a plugin to a mixer channel, you’ll see the plugins you have favorited at the top of the list (unless they are sorted into a category as explained later):
If you want to better organize your plugins, check out the tips below and learn how to create custom categories for your plugins.
FL Studio Plugins Tips and Best Practices
Here are some tips and best practices for using plugins in FL Studio:
Create Custom Categories
To use a plugin in FL Studio, go to the mixer and click one of the insert channels to highlight it as shown below:
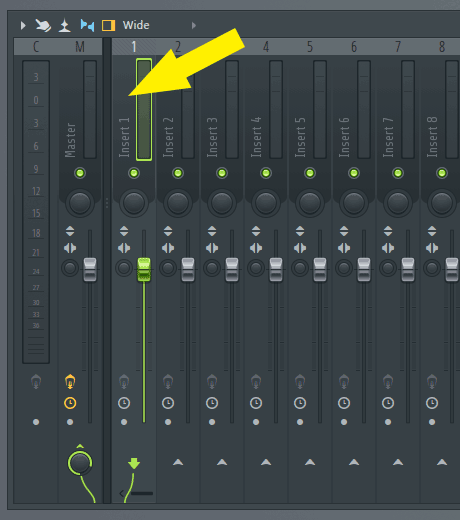
At the far edge of the mixer panel, you will see empty slots you can use to add plugins to a channel:
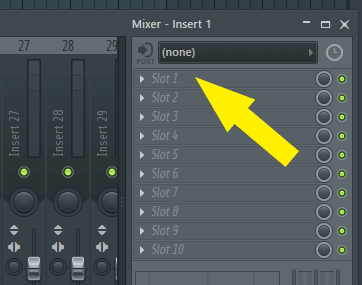
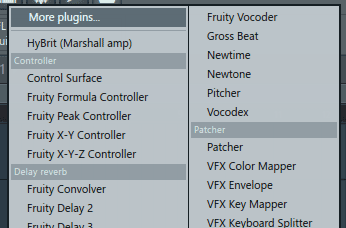
Clicking a slot will bring up your list of plugins. You’ll see that FL Studio separates the plugins into categories by default:
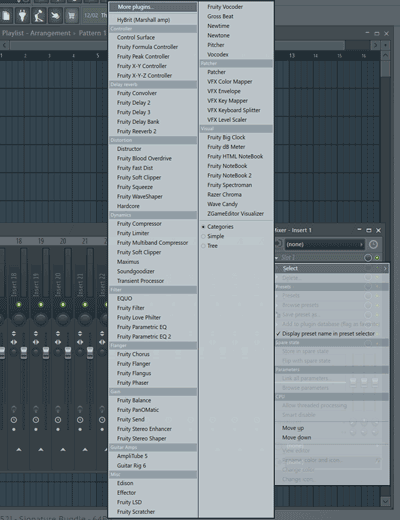
Note: if you don’t see any categories when you open the list of plugins, make sure you have the ‘Categories’ view selected (at the end of the plugin list there are view options).
You can create custom categories to sort out your plugins as you like. If you feel like your list of favorite plugins is spiraling out of control, set up some custom categories to sort them out.
In the Plugin Manager, click a plugin, then enter a category name for that plugin on the left panel under the favorite heading.
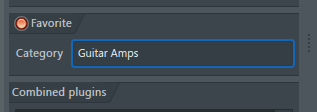
You can see in the above screenshot that I’ve added the HyBrit amp plugin to a custom ‘Guitar Amps’ category. Click the favorite button or else the custom category won’t show in your list.
Click the ‘Apply Changes’ button to save your category.
If you now open your list of plugins, you’ll see your plugin sorted under your custom category. You can see that the HyBrit plugin now shows under the ‘Guitar Amps’ category:
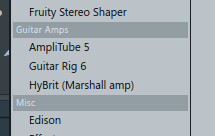
Note that the custom name I set for the plugin also shows here.
Extra tip: the categories are sorted alphabetically. If you want your custom categories to show up at the start of your effects list, create custom categories that start with ‘A’ such as ‘A Guitar Amps’, ‘A Drums’, ‘A Virtual Instruments’, etc.
It’s not ideal, but that will ensure that your custom categories show at the top of the list.
Use the Plugin Picker
FL Studio has a visual tool you can use to access your plugins instead of selecting them from a list.
You can access the inbuilt plugin picker at any time by pressing F8 on your keyboard.
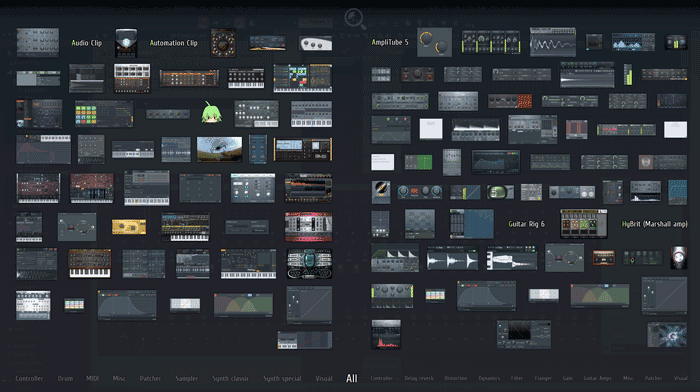
This might look messy, but once you get the hang of it, it can sometimes be faster than trying to find your plugin from a long list.
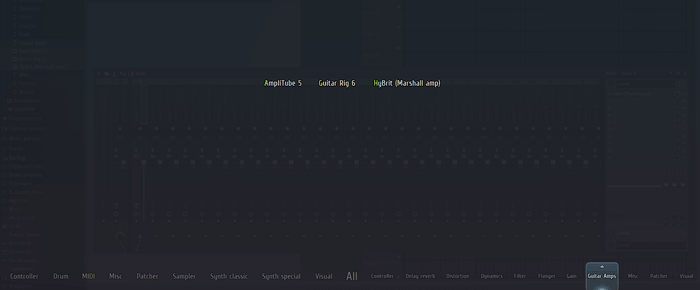
You can easily jump between categories by hovering your mouse over the category names at the bottom of the screen. The plugins for each category will instantly show.
You can see that when I hover over my ‘Guitar Amps’ custom category, it only shows the plugins I’ve added to that category.
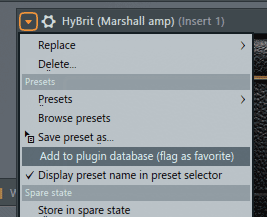
Some plugins may not show thumbnails. To enable a thumbnail for any of these plugins, open the plugin in FL Studio, click the top left corner arrow and select ‘Add Plugin to Database’
Once you find a plugin you want to use, click and drag the plugin and add it to any track or mixer channel.
In the below screenshot, you can see that I have dragged the HyBrit plugin into the ‘Insert 1’ channel on the mixer. It now shows in the list of inserts on the far right of the mixer.
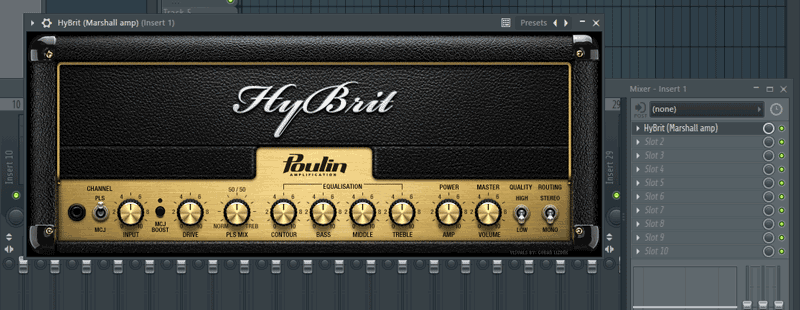
Sometimes you will prefer using the text list of plugins and other times you might prefer the plugin picker. Practicing using both methods to see what works best for you.
Installing Plugins in FL Studio Summary
Here is a quick step-by-step overview of how to install plugins in FL Studio:
- Download a compatible VST plugin
- Open FL Studio and find the plugin directories used in the Plugin Manager
- Install your plugin into the correct directories
- Scan for new plugins in FL Studio’s Plugin Manager
- Sort and organize your plugins by favoriting, renaming, and adding plugins to categories
Once you have followed the above steps, you can add your plugins to your projects as you like. How you add your plugins depends on whether you’re using a generator plugin (eg: synths and virtual instruments), and effects plugins (eg: guitar amp simulators).
Video Tutorial
Here’s a quick video tutorial walking through the above steps:
After you install some plugins, check out these guides to help you get more out of FL Studio:
- Ultimate Guide to Guitar VST Plugins (Best free and paid guitar plugins)
- Ultimate Guide to Drum VST Plugins (Best free and paid drum plugins)
- How to Record Guitar in FL Studio
- How to Create Drum Tracks in a DAW
- Ultimate Guide to DAW Controllers (highly recommended for FL Studio users)
- Recording Guitar FAQs (ask your questions here)