
The Synido TempoKEY W25 is a compact wireless MIDI keyboard controller that packs a lot of features.
In this review, I’ll go through each of the main features to give you an idea of whether this MIDI controller is right for you.
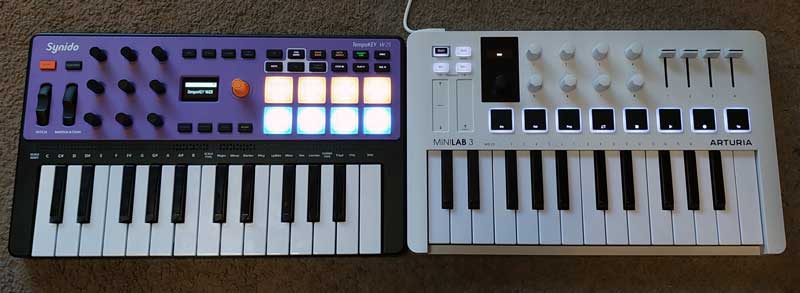
I’ll also compare it to the Arturia MiniLab 3 MIDI controller, which has been my main MIDI controller before trying out the TempoKEY W25.
If you want to learn more about MIDI controllers, check out my Ultimate Guide to MIDI Controllers here.
Synido TempoKEY W25 Features
Here are the main features of the Synido TempoKEY W25:
- Wireless Bluetooth connection
- USB-C and MIDI In/Out/Thru jacks
- Built-in 3000mAh rechargeable battery
- 25 mini-size velocity-sensitive keys
- 8 backlit pads with different velocity-sensitive profiles
- OLED screen
- 9 assignable infinite knobs
- Pitch bend and modulation wheels
- Transport buttons (Stop, Play, Record)
- Octave and transpose up/down buttons
- Arpeggiator, scale, and chord generator
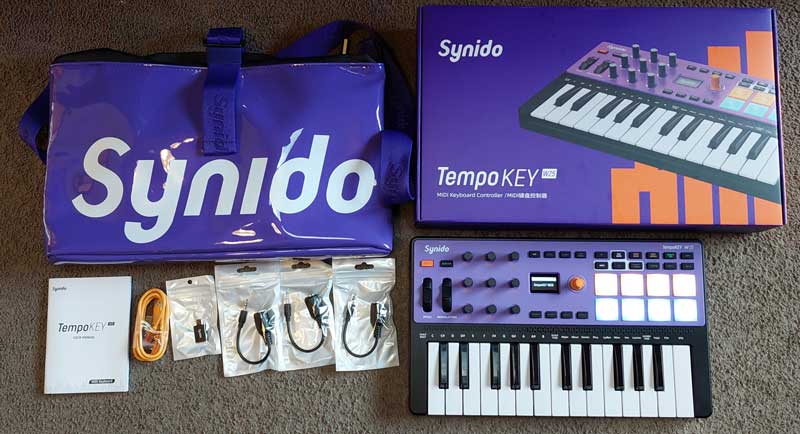
The TempoKEY W25 also comes with a carry bag, USB-C cable, USB-A to USB-C OTG adapter, and 3x 3.5 to 5-pin MIDI Adapters.
Check out the price and details of the Synido TempoKEY W25 on Amazon here.
Synido TempoKEY W25 Ease of Use
The Synido TempoKEY W25 can be used on PC, Mac, and mobile devices either by connecting the supplied USB-C cable or wirelessly using Bluetooth.
Note: I have only tested the TempoKEY W25 on a PC running Windows 11.
Using Bluetooth
Connecting wirelessly is what interested me the most before trying out the TempoKEY W25. While I’ve been happy connecting my MIDI controller to a PC with a cable, I like wireless devices. In the distant past, both my PC keyboard and mouse were wired. Back then, having a wireless keyboard and mouse seemed ridiculous. Now it’s standard. I feel the same shift will likely happen with MIDI controllers.
Connecting to a PC running Windows 11 with Bluetooth unfortunately wasn’t as plug-and-play as I was hoping. Mac users will find it much easier, based on what I can see in the manual.
First, Windows users need to install and open two third-party programs: MIDIberry and LoopMIDI.
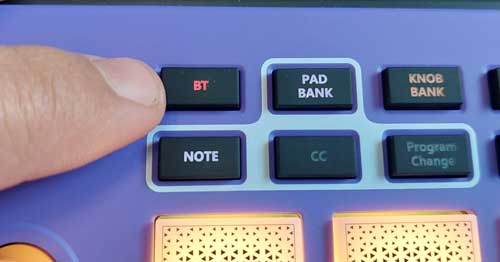
Once you install those programs, you switch the TempoKEY W25 on and press the BT button (it will light up red for pairing mode).
Next, turn on your PC’s Bluetooth and pair the device.
Once paired, you open both loopMIDI and MIDIberry programs and select the Synido TempoKEY W25 in MIDIberry’s input list and LoopMIDI Port in the output list.

Then you can open your DAW and select “LoopMIDI Port” as the input and output devices.
You need to do this every time (except for pairing, which is a one-time step) you want to use the TempoKEY W25 in a DAW.
The only exception to this is if you use Cubase, as it allows Bluetooth MIDI control without installing the MIDI Berry and Loop MIDI apps.
For me, this is disappointing as I hoped it would be an instant plug-and-play every time. I would greatly prefer having to install a custom TempoKEY driver instead of having to rely on two separate third-party programs. It’s not a good experience.
Fortunately, it only takes a minute to run through the steps when I want to use the W25 (or I can just use the USB cable). Mac and mobile users won’t have to worry about these steps; only Windows users who don’t use Cubase.
Once I finally connected to my PC wirelessly, it worked fine. I have experienced no latency or issues with the connection over the last three weeks of testing.
Using USB
Compared to using Wireless, connecting with USB is as simple as you would expect it to be. Just plug in the supplied USB-C cable and select the TempoKEY W25 in your DAW as the input device.
Using MIDI
If you have MIDI devices you want to connect to the W25, you can connect to them using the supplied 3.5 to 5-pin MIDI adapters.
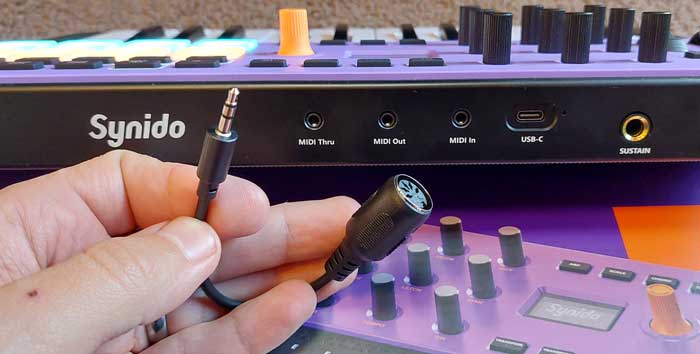
Three of these MIDI adapters are supplied with the W25, so you can use MIDI In, Out, and Thru.
Using the Keys
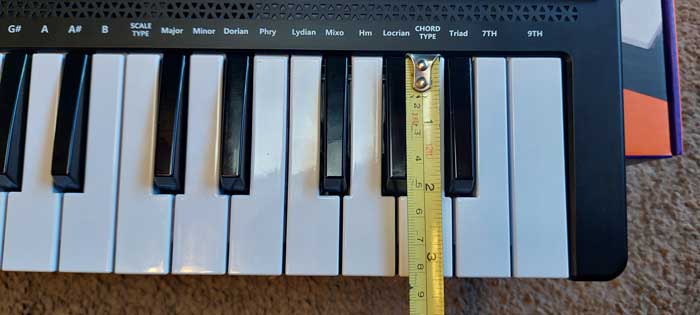
As the name suggests, the W25 includes 25 keys. These are mini-keys, so if you’re only used to playing full-size piano/keyboard keys, they take time to get used to.

I first used mini keys with my MiniLab 3 controller, which has fairly premium-feeling keys. The keys on the W25 are almost the same size as the MiniLab 3 keys, so they felt natural to use straight away. If you’re not used to mini-keys, it will take some time to get comfortable. They don’t feel quite as nice to me compared to the MiniLab 3, but they work perfectly fine.
Using the Pads
The W25 has eight velocity/pressure-sensitive pads, and they are easily my favorite feature of the W25.
On my MiniLab 3, I had the 8 pads permanently assigned to various functions, such as transport controls. So I never used them as pads, and I didn’t feel I was missing out on anything. This changed when I used the pads on the W25.

The pads can be assigned to notes, CC commands, or PC information using the highlighted buttons above the pads. Pressing the PAD BANK button alternates between two different banks, which change the colors of the pads.
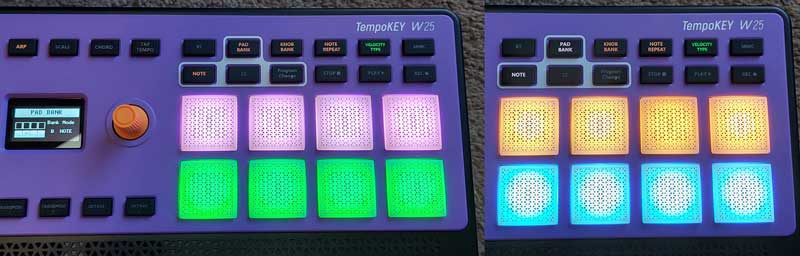
You can assign each pad bank to Note, CC, or PC so you can easily access two different functions for the pads, or you can extend the 8 pads to 16 across the two banks.
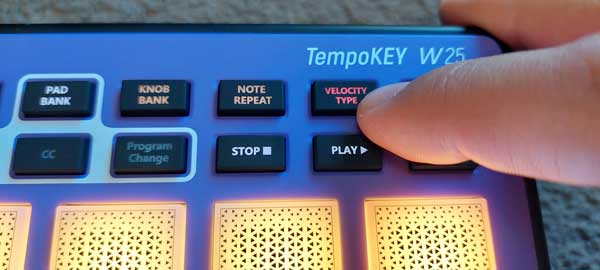
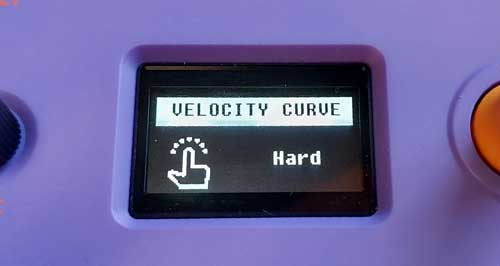
Pressing the VELOCITY TYPE button changes the velocity sensitivity of the pads to one of four different preset options (soft, medium, hard, fixed). The VELOCITY TYPES button even has color-coded lighting so you know what setting you have on (white: fixed, blue: soft, green: medium, red: hard).
Being able to set the pads to a specific velocity mode makes the pads extremely versatile. It’s surprising how different the pads can feel to play when you change to different sensitivity profiles.
As a result, I found myself using the pads more than the actual keys when writing music. If you’re laying down anything rhythm-based, they feel far better to use compared to using the keys. Even writing simple melodies often feels better on the pads than the keys. I’ll probably buy one of those Launchpad-style controllers purely based on how much I’ve enjoyed using the pads on the W25.
It has taken me a long time to realize why pad-based controllers are so popular. Now I get it. While the MiniLab 3 also has 8 high-quality pads, they’re barely functional in comparison to the W25’s pads. Mine are permanently set to transport controls because having on-demand transport controls is such a crucial feature when using a DAW. I found the entire controller annoying to use when the pads on the MiniLab 3 weren’t assigned to transport controls.
This is why the features built into a MIDI controller and how they are to be used are so important to consider. For example, if you have to hold down a SHIFT button to access transport controls, it suddenly makes starting and stopping recordings frustratingly annoying.
So if a controller has a feature you like the idea of, also consider how easy it is to access that feature. Can you just push a button to access it? Or do you need to hold down a SHIFT button or enter a menu first to enable it?
Thanks to the large number of buttons and knobs on the W25, most of the features are easily one button press or knob turn away.
The NOTE REPEAT button changes the pads from single-hit to repeatedly playing the note over and over. You can easily adjust the tempo for the note repetitions using the TAP TEMPO button.
The nine knobs can be used to change the settings for the note repeat (as well as many other uses), so you can easily change the repetitions to match different rhythms (eg: 1/4 note, 1/8 note, etc.). Holding the SHIFT button down before turning the knobs is needed for these functions.
Arpeggiator and scale/chord generator
Some MIDI controllers include arpeggiators and chord generators to give composers quick and easy tools to use to lay down ideas.
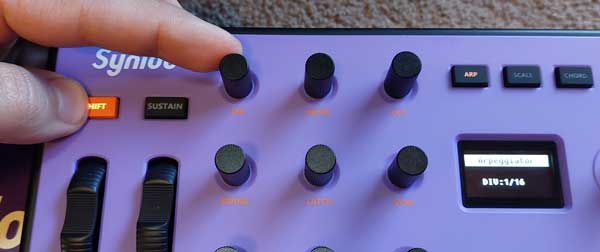
The W25’s arpeggiator is easy to enable (press the ARP button) and tweak (the 9 knobs change different program settings).
Again, the W25 wins compared to my similar-sized MiniLab 3. While the MiniLab 3 also includes an arpeggiator, it isn’t intuitive to use.
I never use the arpeggiator on the MiniLab 3, while I often use it on the W25. It’s just so quick and easy to dial in the settings I want, thanks to the easily accessible options.
OLED Display
While it would be possible to use the W25 completely without the display, it does make everything slightly easier.
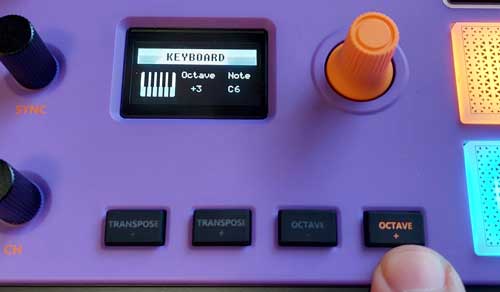
At a glance, you can see what MIDI commands are being sent from the last knob/pad you just touched. If you shift the octave up or down, you can see exactly what octave you’re currently on (eg: +3 octaves) and what the current MIDI note is (eg: C6 for the middle C key).
I also like that it displays the velocity of the last pad hit in numbers and a graphical display:
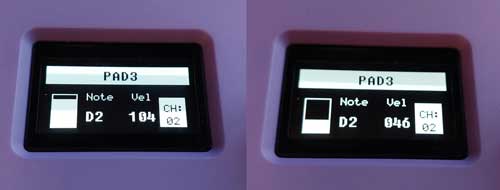
The screen is just large enough that you can clearly read the text. It’s also very responsive. It will instantly show the current pad information, even when I quickly tap back and forth between pads.
Synido TempoKEY W25 Overall Impression
Overall, the TempoKEY W25 packs in a great number of features, and most of those features are instantly accessible with one or two button presses.
The pads are excellent and can be customized using a variety of pressure sensitivity profiles. Being able to switch the pads between note, CC, and PC is simple and handy to have.
The 25 mini keys feel fine to use once you get used to the smaller size. Shifting the keys up or down an octave (to 3 octaves up/down) is simple with the central-positioned buttons.
The wireless function works great, and it’s ideal for musicians wanting to use a controller with mobile devices or on the go.
It is disappointing that Windows users will need to install and use two third-party programs to be able to use wireless (unless you use Cubase). Mac and mobile users won’t have this issue.
I also like that the controller holds your settings when you turn it off. If you have the keys set to +3 Octaves and the pads set to Bank B with repeating notes and arpeggiator on, all of those settings will continue if you turn the controller off and on again.
That means you’re not starting with a blank slate every time you turn it on. You don’t have to set everything back to your preferred settings. You simply get straight into your music.
Overall, the build quality is fine for this price point. I’ve only used the unit for a month as of writing this review, so I’ll update this if I experience any reliability issues.
Synido TempoKEY W25 Pros and Cons
Here are the main pros in my opinion on the TempoKEY W25:
- Wireless connection
- Wide range of features
- Easily accessible features with plenty of buttons
- Color-coded buttons
- Good pads
- Good display
- Includes useful cables and good quality carry bag
Here are the main cons:
- Wireless for Windows users requires two third-party programs to work
- The keys feel cheap compared to other controllers
Overall, I’m quite impressed with the TempoKEY W25 and have enjoyed using it.
Who is the Synido TempoKEY W25 for?
If you don’t already have a MIDI controller, I have no problem recommending the TempoKEY W25 to you. The range of features is great, and more importantly, it’s quick and easy to learn how to use the features.
If you do already have a MIDI controller, compare how you currently use your controller to how you would expect to use the W25. I’ve explained throughout this review how much easier the W25’s features are to use compared to my MiniLab 3, so if your current controller includes similar features, think about whether the W25 would be an improvement over what you current use or not.
Synido TempoKEY W25 vs Arturia MiniLab 3
As I explained earlier, my previous main MIDI controller is the Arturia MiniLab 3. I bought it because it includes knobs, faders, pads, and keys. I thought I would use all of those controls when composing.
Then once I started using it, I quickly found I didn’t like using the knobs and faders and preferred using my mouse to tweak relevant settings in my DAW. I also found that if I wanted to have on-demand transport controls (Record, Stop, Play) without having to hold a SHIFT button, I needed to change to a mode that would replace the normal pad function with transport functions. So I had to give up the pad function completely.
When I first tested out the TempoKEY W25, it became clear to me how poor the MiniLab 3 is when it comes to easily accessible features.
The MiniLab 3 has four buttons and one main knob to handle different modes and functions. The rest of the functions are only accessible through the pads.
Compare this to the TempoKEY W25, which has 22 feature buttons, one dedicated knob, and nine knobs that can access more parameters when holding the SHIFT button.
It’s night and day in how easy the W25’s features are to use compared to the MiniLab 3. I don’t have to compromise and give up pad functions to access other functions such as tap tempo or transport controls.
While the MiniLab 3 has better quality keys and pads, it feels limited due to its minimalistic design. The TempoKEY W25 gets a lot right and should suit a lot of musicians.
Check out the price and details of the Synido TempoKEY W25 on Amazon here.
Related Guides and Lessons:


