
Frustrated with your guitar amp and thinking about getting an upgrade?
Want to nail a specific guitar tone but your amp can’t seem to get it?
Feel like you’re ready to move up from a ‘beginner’ amp to something more serious?
Has somebody told you that your amp isn’t suitable for the style of music you play and you should get something else?
Then this guide is for you.
As a guitar teacher, I constantly see beginner and intermediate guitarists get frustrated with their amps, then buy a new one in search for the perfect tone only to get frustrated again a few weeks later.
Before you go and ‘upgrade’ your amp, let’s see if we can get the most out of your existing one first.
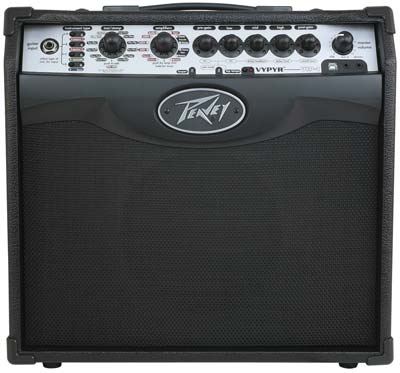
If you are considering buying a different type of guitar amp, have a read through my Guide on Types of Guitar Amps. Learning how different types of guitar amps compare will help you work out whether the amp you have right now really is the best for your needs.
1. Raise your mid-range (even if you play metal)
If you play metal, rock or similar styles you will probably be familiar with the ‘scooped’ sound – rolling the mid EQ knob all the way down while keeping both the bass and treble high as shown below.
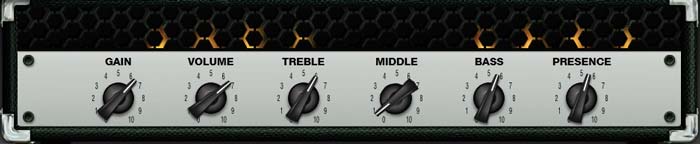
Try using a scooped sound with your distorted amp now to get a feel for what I’m talking about. Leave your bass and treble EQ knobs half-way (12 o’clock) while rolling the mid knob all the way down (7 o’clock). You will hear a very hollow (hence the name ‘scooped’) sound that has a lot of bass and a nice bright sizzle.
While a scooped sound can be a bit of fun to play with, the real problem with a scooped sound is that it tricks you into thinking that you’re playing with a good tone. A scooped tone might sound fine on its own, but it sounds horrible as soon as you play along with anything else such as a backing track or band.
Try loading a backing track and play along using a scooped tone. What you will find is that you might have trouble hearing your guitar over the backing track. The high bass and treble clashes with the other instruments and the lack of mid range means your guitar won’t stand out. Guitarists in this situation tend to raise their volume which only causes more problems.
The reality is that almost all guitarists use a lot of mid range. It’s the mid range that helps the guitar stand out when played in a band.
Try raising your mid-range and listen to how your guitar stands out when you play along with a backing track. Even at the same amp volume, your guitar will stand out clearer than before.
Of course, if you raise the mid too high, your guitar will get a muddy and nasally sound so your job is to find the sweet spot.
Recommended actions:
- Start with your bass, mid and treble knobs all at 12 o’clock
- Play guitar along with a backing track and think about how it sits with the other instruments
- Raise the mid slightly and listen to how it changes your tone
- Continue raising the mid and playing until it’s all the way up
- Start dialing the mid back until you find the sweet spot
- Adjust the bass and treble slightly to suit your preferences
Key lesson: raise your mid range when you’re playing along with a backing track or playing in a band. It’s the mid range that will help your guitar stand out in the mix.
2. Lower your gain for more clarity
When I worked at a guitar shop, the first thing I noticed a lot of guitarists do when they try out a distortion pedal is they crank the gain up. They would crank the gain all the way up so it completely saturated the tone.
While that sounds fun when you play big power chords at a high volume with super high gain, it creates a big mess as soon as you play anything else.
Even if you play a style where high gain distortion is common, rolling the gain back a bit tends to produce a better tone overall.
When you have the gain up high, the tone is so distorted that it becomes a wash. As soon as you play with a backing track or in a band, the over-the-top distortion gets buried in a sea of noise.
When you roll the gain back, you start to get more clarity. The further back your roll the gain, the more clarity you hear until you end up with a clean tone.
So while it might sound fun to crank the gain up so you end up with super high sustain and saturation, rolling the gain back a bit will greatly improve your tone.
Recommended actions:
- Use a distortion pedal or your guitar amp to produce a distorted tone
- Raise the gain level to what you normally use
- Slightly back it off and jam along with a backing track for a while
- Back it off again and jam along with the track
- Continue slightly backing it off until you feel that it’s taking away from your tone
- Find the sweet spot where you have a good balance of clarity and distortion
Key lesson: slightly backing off the gain tends to improve your tone
3. Move your guitar amp
This is such a simple tip but it’s so commonly overlooked by guitarists (even advanced guitarists often neglect thinking about your amp’s location).
The location of your guitar amp plays a big role in your tone – especially if you’re playing in your bedroom. This is also important if you’re recording at home. Find out how to get the best recording tone with advice from my Guide on Recording Guitar at Home.
People setting up home theaters often spend a lot of time positioning the speakers to give the perfect experience. A slight adjustment in the angle, distance, height and position of surround sound speakers can completely change the end results. It’s the same with your guitar amp.
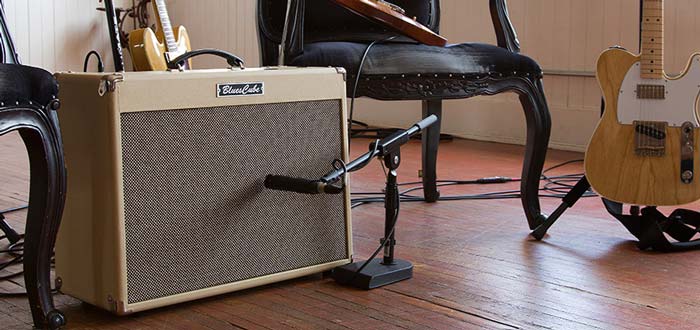
A guitar amp sitting on the floor sounds different from the same amp sitting on a bench. The same amp will again sound different if it is sitting against a wall. If your room has wooden floor boards (like the photo above), your amp will sound completely different when placed in a room with carpet or tile flooring.
To get a feel for what I’m describing, play your guitar with your amp in these positions:
- On the floor hard against a wall
- On the floor away from the wall
- On a table
- On a carpeted floor
- On a tile floor
- Angled 45 degrees pointing up (only recommend for small combo amps)
Each time you move the amp you will hear a different result. For example, when the amp is on the floor you will hear less treble compared to when the amp is on a table. If your amp has an open cabinet then placing it against a wall will completely change the bass you hear.
The point here is that you want to find the best position for your amp so you enjoy the tone it produces. Simply shifting the amp away from a wall or placing it off the ground could be all that it takes to get the tone you want.
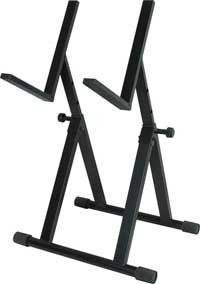
If you find that you like the sound of your guitar amp when raised off of the floor or on an angle, you might want to consider buying a guitar amp stand like the one listed here on Amazon: Musician’s Gear Deluxe Amp Stand.
Key lesson: learn how your tone changes based on where your amp is positioned. Experiment and find the ideal position for your amp in your home.
4. Ignore guitar amp settings recommendations
If you search for guitar amp settings in Google, you will find a lot of articles offering suggestions on amp settings for different styles. I highly recommend you ignore and avoid articles that give you presets.
The reason is simple: every guitar amp is different so recommended settings are meaningless.
For example, a person might recommend the following settings for rock: Gain 5, Bass 4, Mid 6, Treble 4, Volume 7. When you dial that into your amp, it might sound nothing like a rock tone. The reason is that every amp’s controls are different. Gain set to 5 might be way too high for one amp and way too low for another amp. Mid at 6 might sound muddy on one amp and thin on another. So these type of recommendations are pointless.

While some people might argue that these recommendations ‘get you in the ballpark’, in reality they will more often than not set you in the wrong direction. For example, most guitar amp settings for metal I’ve seen recommend a scooped mid. As explained earlier, that’s not the best approach.
If you want to learn how to correctly set your amp for different tones, I talk about this in detail on my Ultimate Guide to Guitar Amp Settings. It’s possibly the most important guide I’ve written so far on this website.
Key lesson: while it might sound like a good idea to look up guitar amp settings online for ideas, you will learn more and become a better guitarist when you ignore those recommendations.
5. Use your pickups wisely
If you’re new to playing on an electric guitar, you may not be completely familiar with your pickups yet. Knowing which pickups to use in different situations can mean the difference between a good tone and a horrible tone.
Quite often a guitarist buys a new guitar amp because they felt it didn’t produce the right tone when in reality it was the pickups causing the problems. Knowing which pickup to use will take some time as every style, riff, and song is different.
If you want to play a mellow lead line in the upper range of your guitar and you have your bridge pickup selected, you’re likely to experience a painfully sharp and piercing sound as you reach the higher frets.
The solution there isn’t to roll back the treble knob on your guitar amp, the simple solution is to switch to a neck pickup. To an intermediate or advanced guitarist this is obvious, but when you’re starting out you need to figure all of this out by trial and error.
As another example, if you want to play some rock or metal riffs, if you’re using a neck or middle single coil pickup, then you’re going to get a very flabby and muddy tone. Switch to a bridge humbucker and you’ll get the punchy tone suitable for those styles.
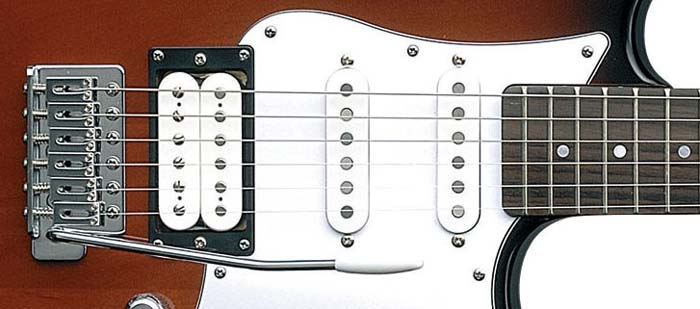
Guitars with a combination of humbucker and single coil pickups like the above Yamaha Pacifica 112v are usually a good choice for beginners as they give good flexibility in the type of tones you can produce. If you play a range of different styles or you’re unsure what type of music you want to play, this type of pickup configuration will cover a lot of bases.
For example, to get a decent rock, punk or metal tone, you could use the bridge humbucker. Then if you want to more mellow tone for blues you could switch to the middle or neck single coils. If this guitar only had humbuckers or only had single coils, you wouldn’t have the same flexibility.
I’ll write a guide with more advice on pickups in the future so subscribe to my newsletter for more advice on this topic.
As a simple guide, any time you learn a new song play around with pickup choices for every section. So experiment and hear how the verse/chorus/solo sections sound with each pickup option you have. You will gradually get a feel for what type of parts match up to different pickups.
Key lesson: the pickups you use play a massive role in your tone. Learn to match the correct pickup choice with the guitar amp settings and guitar parts for the best tone.
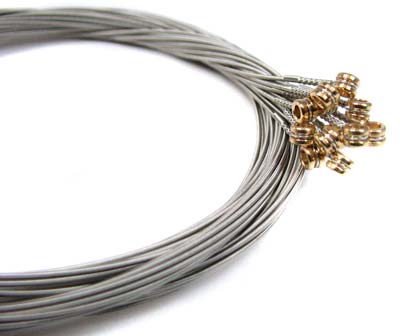
6. Fresh strings, fresh tone
Does your tone sound dull and lifeless but you know for sure it didn’t sound like that when you first got your guitar amp? Well, it’s not your amp, it’s probably your strings (or your preferences for tone have changed over time).
Your strings will gradually become dull over time as you use them. It happens so gradually you barely notice how your tone changes over time. It’s only when you put on a new set when you find out how big a difference a new set can make. If you haven’t changed your strings in the last few months and you play daily, a new set will give you a fresh tone upgrade.
So how often should you change your strings? Ask a guitar store or string company and they will tell you something crazy like every week. They will recommend a really frequent interval because it means they will get more money that way! But unless you’re a gigging or recording guitarist, you’re not really going to need new strings every week.
Not only is it annoying to constantly change your strings, it adds up to a lot of money over time.
Get a feel for when you start to notice your strings lose their vibrancy. For some guitarists this could be within a month of use while other guitarists it could be after a few months. It depends on how often you play so I can’t give you an easy guideline.
One suggestion I do have which will make a big difference is to buy a guitar cleaning kit and wipe your strings down after any practice session. The oil in your fingers will shorten the life of your strings and simply wiping them down extends the life and tone.
Use a simple cloth or rag to wipe down the strings and make sure you get under each string to remove any buildup.
I recommend using something like the Music Nomad as it’s a very quick and easy way to wipe your strings down which will mean you will do it more often.
Learn how different metals, gauges, coatings, windings, and more can affect your tone and playability in this guide: Ultimate Guide to Guitar Strings.
Key lesson: if you’re not regularly cleaning your strings and semi-regularly changing them, your tone will suffer.
7. Use your guitar amp’s effects loop (if it has one)
Take a look at the back of your guitar amp to see if it has a ‘send’ and ‘return’ labeled something like ‘FX LOOP’ (example shown below).

If so you’re in luck because an effects loop is a handy feature to have. If you don’t have one skip this tip and in the future when you consider buying an amp, have a look if it has an effects loop or not.
The idea behind an effects loop is that you can place some of your guitar pedals after your guitar amp’s distortion/overdrive. In the same way that some pedals sound better when placed after a distortion pedal instead of before it, some pedals will sound better when placed in your guitar amp’s effects loop.
Pedals such as delay or reverb sound the best in a guitar amp’s effects loop.
So if you have a large number of guitar pedals and you’re currently plugging all of them into the front of your guitar amp, placing some of them into the guitar amp’s effects loop can be a great way to improve your tone.
Check out my guide on how to use the four cable method to learn how you can use your amp’s effects loop to improve your tone.
Make the most out of your amp
Before you consider upgrading your guitar amp or any other piece of gear, make sure you fully exhaust its possibilities. I’ve seen beginners sell perfectly good amps at a loss without learning how to use them properly.
Most beginner guitar amps available today are far superior to what was available to beginners a few decades ago. So while it might be tempting to want to buy a bigger, newer and flashier amp, try to make the most of what you have first.
In addition to the above tips, to really get the most out of your amp I recommend going through the advice in this guide: Ultimate Guide to Guitar Amp Settings. In that guide, you will walk through how to tweak your amp’s settings and find suitable tones for different situations. If you’ve just bought a new amp or are frustrated with your tone, that guide is a good starting point.
Guitar Amp FAQ
While most questions you might have about guitar amps are covered in full on my Guitar Amp Settings guide, here are some common questions guitarists have about amps.
How can I make my guitar amp sound better?
The more you understand about tone and your amp, the easier it is to dial in better tones. Learn what each knob does on your amp and how each one affects your tone. Instead of blindly following presets you find online, learn to build tones from scratch. It might feel harder at first, but you’ll end up with far better results.
Part 2 of my Guitar Effects Course teaches you how to do this using a step-by-step method. If you’re serious about getting a better tone from your amp and pedals, check the course out.
How do I find the distortion on my amp?
Your amp isn’t likely to have a knob labeled distortion, but most guitar amps do have the ability to add distortion to your tone. Most guitar amps have a gain or drive knob or pre-gain and post-gain knobs. When these knobs are adjusted in the right way, it brings distortion into your tone.
Some guitar amps have dedicated channels with inbuilt distortion. If you can’t seem to get any distortion in your tone, look if your amp has a button or switch for different channels. You might be in a clean channel and need to change to one of the drive channels to get a distorted tone.
Usually, you need to balance the gain knobs with the volume knobs to get your tone the way you want it. Turn the master volume knob down, then adjust the gain knob. You should hear your tone start to distort. Keep adjusting the gain and volume knobs until you get the right amount of distortion at the volume level you want.
What is EQ on guitar amps?
The EQ knobs on your amp control your overall balance of tone. EQ is a way for you to shape your tone in a very controlled manner. It gives you a way to dial in Normally guitar amps have three EQ knobs: Low/Bass, Mid, High/Treble. Some amps even have a fourth EQ knob to give you more control: presence.
You can give your tone a ‘scooped’ sound by turning the mid knob down or you can reduce the high end if it sounds a bit grating. EQ on your amp gives you a way to fine-tune or completely change your tone.
What does the presence knob do on a guitar amp?
The presence knob on a guitar amp is an EQ knob. While most guitar amps have three EQ knobs (bass, mid, treble), some guitar amps add in a presence knob as the fourth EQ knob.
The presence knob targets a specific frequency range that makes your guitar more or less ‘present’. Some guitarists think of presence as the perceived distance the guitar is from you. In other words, crank the presence knob and it feels like the guitar tone is right in your ear. Turn the presence knob down and your guitar feels further away.
If your guitar amp has a presence knob, experiment with it to learn how it affects your tone.
What does gain do on a guitar amp?
Most guitarists think of the gain or drive knob on their guitar as a distortion knob. If you turn the gain knob up, it adds distortion to your tone. A better way of thinking of the gain knob on your guitar amp is it’s a way to adjust the strength of the signal.
A low gain setting will give your tone a thin and soft sound. With a low gain setting, you might have to turn the master volume up to compensate. If you completely crank the gain knob, you’ll hear your tone completely saturate with distortion. You might have to then turn the master volume knob to prevent the volume from blasting your ears.
Learning how to dial in the perfect settings for your gain knob is an important part of getting a great tone from your amp. My Guitar Effects Course explains how to do this with a step-by-step method.
What does ‘crunchy’ guitar mean?
When you hear guitarists talk about a crunchy tone, they’re talking about a tone that has some distortion. The tone has enough distortion to give the tone a punchy feeling, but it isn’t completely saturated with distortion.
Classic rock guitar tones are great examples of crunchy guitar tone. If you listen closely to the guitars in an AC DC song, you’ll hear that they feel punchy, but they aren’t completely distorted. In my Guitar Effects Course, I can teach you to dial in different crunchy tones and you’ll hear plenty of examples of crunch tones in action.
Found this guide useful? Please share it on social media to help support this site (if you use Pinterest, please pin the below photo).
