
Hydro Dipping a guitar or guitar pedal is a great way to create some interesting and unique artwork.
Every Hydro-Dipped guitar or pedal is unique and you can customize your artwork with as many colors or swirls as you like.
In this guide, I’ll cover everything you need to know to Hydro Dip your guitar or guitar pedals.
By the end of this guide, you will know:
- What equipment you need to Hydro Dip your guitar or pedals
- Step-by-step instructions
- Tips and best practices
- Common mistakes to avoid
- Lessons I’ve learned
While Hydro Dipping might seem hard at first, you’ll be ready to get started by the end of this guide.
Hydro Dipping vs Swirl Paint vs Marbling
You’ll hear a lot of different terms used when talking about this topic. Here are some closely related terms you might hear:
- Hydro Dipping
- Immersion Printing
- Water Transfer Imaging
- Water Marbling
- Swirl Painting
- Hydrographics
All of the above terms refer to dipping an item into something to transfer paint or graphics to it.
To keep things simple, you can split all of the above terms into two categories: paint or printed graphics.
Terms such as Hydrographics, Immersion printing, or Water Transfer Imaging apply printed patterns or artwork onto an item using water.

The above photo shows an example of applying some printed graphics to an item. A film of graphics is placed on top of a container of water and the graphics are transferred to the item when dipped in.
You can use Hydrographics to apply printed artwork to a guitar and there are a lot of options for custom graphics you could use.
I won’t cover Hydrographics in this guide as I haven’t tried it yet and there are some extra important steps you need to know.
The other method involves dripping or spraying paint on top of a container of water. When somebody talks about Swirl Painting, Marbling, or Hydro Dipping, this is what they usually refer to.
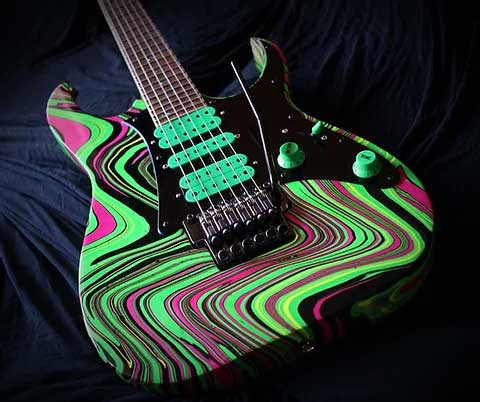
The above Ibanez is a classic example of this type of Hydro Dipping and it’s what I’ll cover in this tutorial.
Hydro Dipping Equipment
There are only a few essential items of equipment you need to Hydro Dip your guitar or pedal.
Paint
There are many different types of paint you could use, but I suggest one of two possibilities: spray cans or Humbrol enamel.
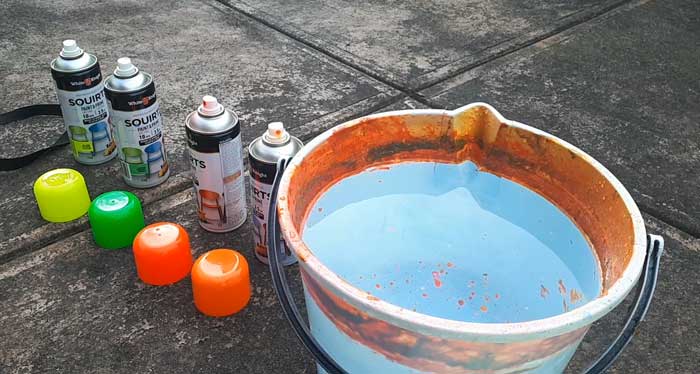
Spray cans: most people recommend Rustoleum, but other brands will work to varying degrees. I used White Knight brand spray cans because they had some fluoro colors I wanted to try and they worked fine.
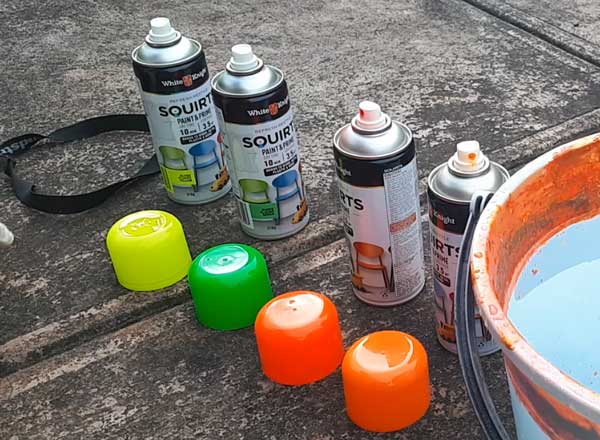
Spray cans give you less control over intricate swirling patterns, but they can still produce some impressive results.
Humbrol enamel: these little pots of paint are usually used on models. Using a pipette, you can drop the paint onto the water and create some impressive swirls.

While I haven’t tried this method yet, it looks like you have far more control over creating intricate swirling patterns compared to spray paint.
Container
Find a container big enough to completely dip your item. The container needs to be wide enough for the item as well as deep enough to completely submerge it without it hitting the bottom.
For a guitar pedal, a standard bucket is perfect.
For a guitar, a large container will be needed so you can completely submerge it.

You’ll also need a lot more paint to properly cover the surface of the water. So buy more paint than you think you might need just in case.
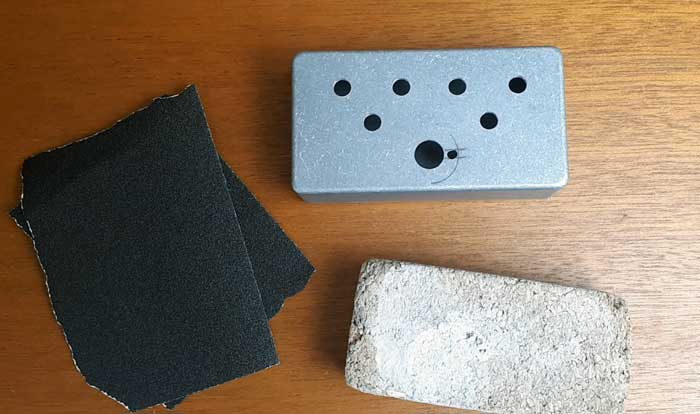
Sandpaper
Sandpaper is used to prepare the surface of your guitar or pedal.

Buy a range of sandpaper from 120 grit up to 360 grit to prepare the surface of your guitar or pedal.
For creating a mirror-smooth finish on your guitar, buy a range of wet-and-dry sandpaper from 1200 grit to as high as you want. You can even buy some polishing compound for the best results.
Mask
If you’re going to use spray paint for your dip, you need a mask.
Even if you will be doing this outdoors or in a well-ventilated area, the fumes from the paint are nasty and can quickly build up around you.
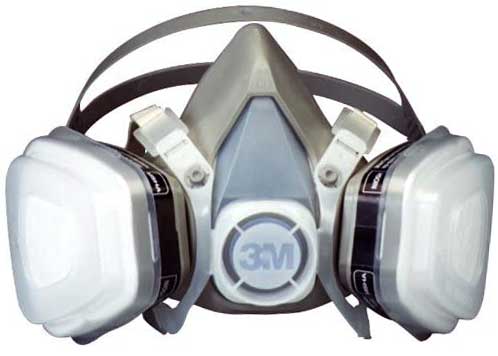
Get a mask with proper filters to deal with the paint. You don’t want to end up in a coughing fit as you’re trying to dip your guitar.
Plus, you really don’t want any of this getting into your lungs.
Hydro Dipping Step-by-Step Tutorial
Let’s go through the basic steps to hydro dip your guitar or guitar pedal. I’ll demonstrate the steps using a guitar pedal enclosure, but you can follow the same steps with a guitar.
Step 1: Sand Your Item
The preparation work you put in will help you get better results.
If you want to Hydro Dip a guitar, you first need to sand the original paint or finish down. You don’t have to sand your guitar down to bare wood, only sand it enough to remove the gloss finish.
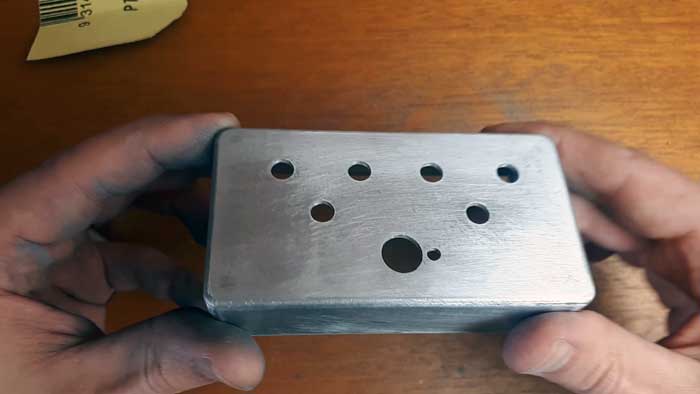
If you want to Hydro Dip a guitar pedal, you only need to sand the enclosure enough to get a nice and smooth finish.
The basic method with sanding is to start with lower grit sandpaper and work your way to higher grit sandpaper.
Lower grit sandpaper is rougher and will take more material off in less time. But it will also leave deeper scratches in your item. So avoid starting with anything less than 120 grit or you’ll spend most of your time trying to remove the scratches it creates.
Try starting with 180 grit, then work your way up to 400 – 600 grit.
Use your judgment on when you can stop sanding. As long as you have a smooth surface, it should be fine. A decent coat of primer will fill in any minor imperfections on the surface.
Step 2: Tape Your Item
If you’re spraying a guitar, you will probably want the entire surface covered in paint. But there may be some areas you don’t want to be covered in paint such as the neck pocket (on a bolt-on guitar), or the internal wiring cavity.
Think about where you don’t want the paint to go and tape those areas up with painter’s tape.
With a guitar pedal, you get the best results if you tape up the inside so the paint cannot go through any holes.
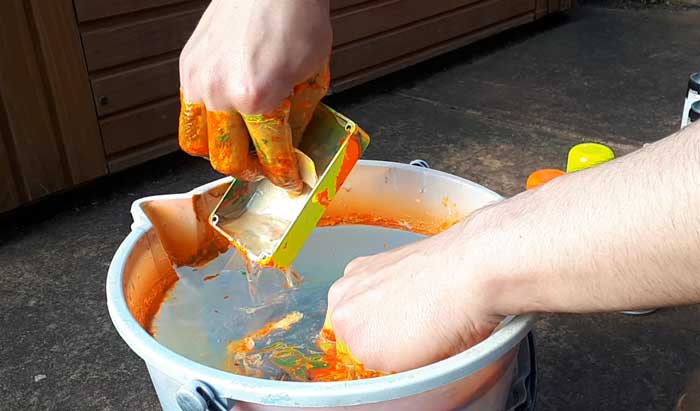
In addition to taping the holes in a pedal enclosure, you can use a piece of tape as a handy way to hold the pedal as you dip it.
Take a length of tape and fold it as shown below to create a handle:
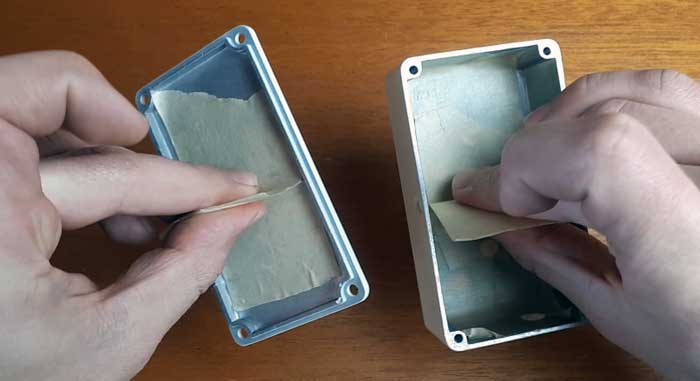
You can grab this handle of tape to get a good grip on your pedal as you lower it into the water.
Once you have taped up any areas you don’t want to be covered in paint, you’re ready to apply a base coat.
Step 3: Add a Base Coat
There are two reasons why you should add a base coat to the surface of your item before you Hydro Dip it.
The first reason is the base coat helps the paint from the Hydro Dip stick to the surface.
The last thing you want is to put all of this effort in and the paint runs straight off of your guitar when you dip it.
The second reason is to avoid gaps in your Hydro Dip. Sometimes there may be slight gaps in the paint when Hydro Dipping. Without a base coat, these gaps will reveal the guitar or pedal surface.
Adding a base coat gives you a good fall back in that you can choose what color you want to show if there are any gaps in your base coat.
Most of the time a white base coat will look best. But you can use a different color if you choose.
So take the time to do a proper base coat.

This can be as simple as buying a spray can of primer and giving your guitar a good coat.
If you want to Hydro Dip a guitar, remove the neck (bolt-on necks) or tape the neck up (set neck or neck-thru). Hang the guitar up so you can apply paint to the front, back, and sides in one go.
If you want to Hydro Dip a guitar pedal, you can simply sit the enclosure and back panel down as you don’t need to paint the inside.
Start with a very light coat applied evenly over the entire surface. This will help the heavier coats to stick to your guitar or pedal. Let it rest for a minute before you apply the next coat.
Spray a few light coats to gradually build up the amount of paint on your guitar or pedal.
Spraying light coats avoid runs or pools of paint. If you spray too close to your guitar or hold the can too long over one area, you will likely get a run.
Continue adding light coats until you have a nice and even coat completely covering the surface.
Let the coat completely dry before you Hydro Dip it. Letting it dry for 24 hours is best.
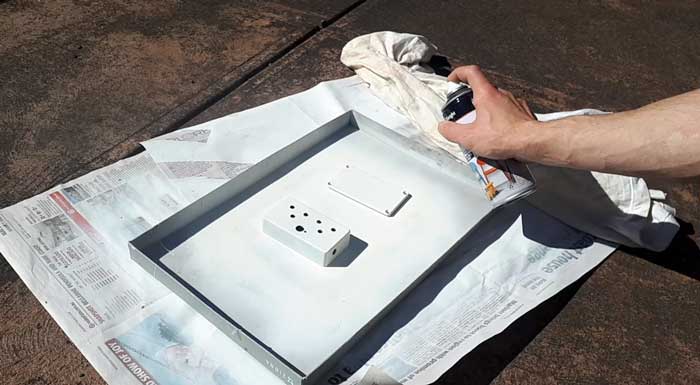
Most primer spray paint is available in white. If you want a different color as your base coat, first apply the white primer. Then spray your item with your chosen color.
With my guitar pedal, I added a yellow base coat as I didn’t want to see white if there were any gaps in the Hydro Dipped paint.
If you add another coat of paint with a different color, give it time to completely dry before you dip it.
Step 4: Prepare the Water
Fill your container with water in a suitable location.
I talk about indoors vs outdoors later as well as the water temperature in the tips section, so read that to decide which is best for you.
If you do this outdoors, pick an area sheltered from the wind and pick a day with nice weather that isn’t going to turn on you.
If you do this indoors, set up a fan in a suitable place to help with ventilation. Make sure the fan doesn’t directly blow over the water or it will move the paint around.
Step 5: Get Everything Ready
As soon as you start spraying the paint, you’ll be working against the clock. The longer you take to spray and dip your item, the more chance the paint will start to dry up and it won’t stick properly.
Once you have your container filled with water, get everything ready.
You want to be able to work fast, so have everything you need on hand.
Have the spray cans ready-to-go with the caps removed and shake each one for a minute.
Put your gloves on and have a spare set nearby just in case.
Put on your mask.
Get some paper towels ready within reach to clear the paint from the surface after you dip your item.
Make sure your guitar or pedal is within reach so you can dip it as soon as the paint is ready.
Double-check you have everything ready to go before you start spraying the paint.
Step 6: Spray the Paint
While spraying the paint, you need to move quickly, but don’t rush.
Hold the can at a decent distance away so it doesn’t disturb the water, cause ripples, or you see the paint break up on the surface.

If you see a nice and even coat as shown above, that’s a good spraying distance. Notice that the water is barely disturbed and the paint is evenly spreading out over the water.
If you see ripples and the paint breaking up as seen in the below photo, that’s too close.
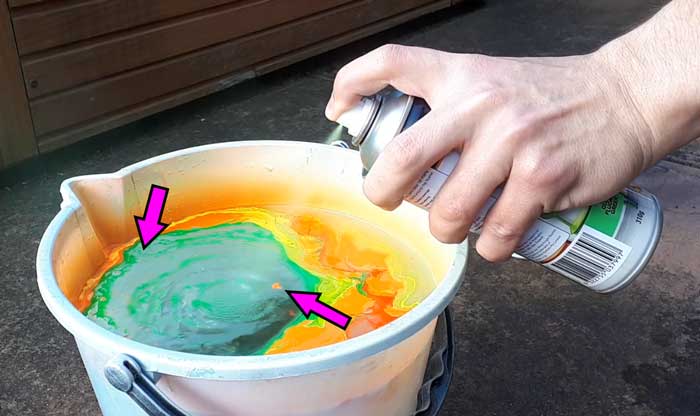
You can see the green paint has separated into streaks as shown on the left. The water is too agitated and it has caused some of the existing layers to break off into blobs as shown with the arrow on the right.
You can see that my hand was way too close in the above photo. Compare it with the earlier photo to get an idea of how far back you should hold the can.
I recommend doing your first dip with a practice item so you can get used to correctly spraying the paint.
Quickly switch between cans and apply one layer at a time. You can either spray each new layer in the middle to build up rings of color, or you can vary the position of each new color.
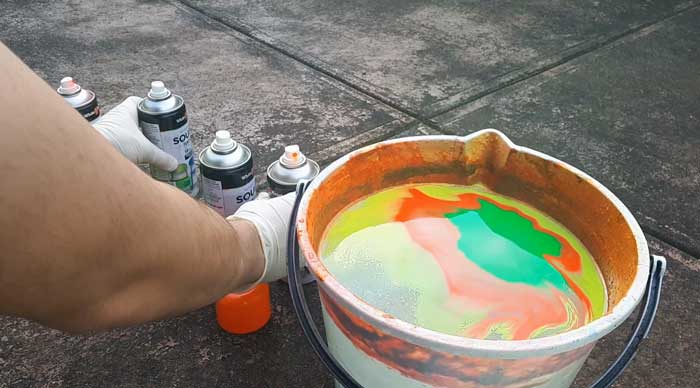
Use your judgment on the order of the colors and the overall balance. Some paints seem to overpower others, so watch out for this.

You want to build up a light coat of paint on the surface of the water. If there is too much paint, you’ll end up with a blobby mess on your item (trust me on this).
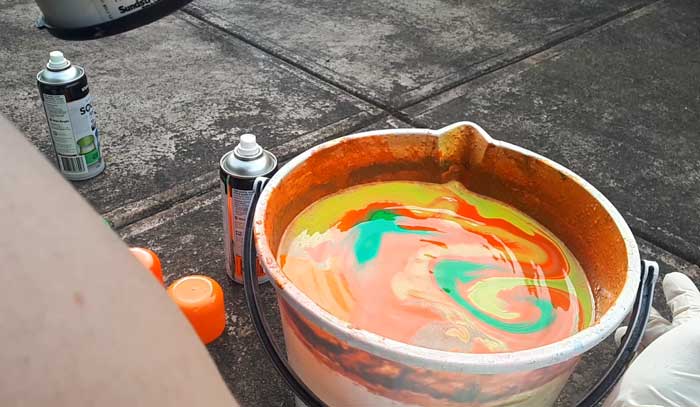
Once you’re happy with the amount of paint on the surface, you can decide whether you need to swirl it.
This can be done using a toothpick or small stick to lightly swirl the paint around the surface for a more interesting pattern.
I found that by lightly tapping the side of the bucket (don’t agitate the water too much), the paint would slowly shift in an interesting way.
There are many different ways you can do this, which is why I recommend practicing on different items before you do this on your guitar or pedal.
Once you’re happy with the pattern you see, you’re ready to dip.
Step 7: Dip Your Item
The sooner you dip your item after the paint has been applied to the surface of the water the better.
Don’t wait too long or the paint may dry and have trouble sticking to your item.
Decide on which area of the paint you like the pattern the most. Aim to dip your item in an area with nice swirling or color patterns.
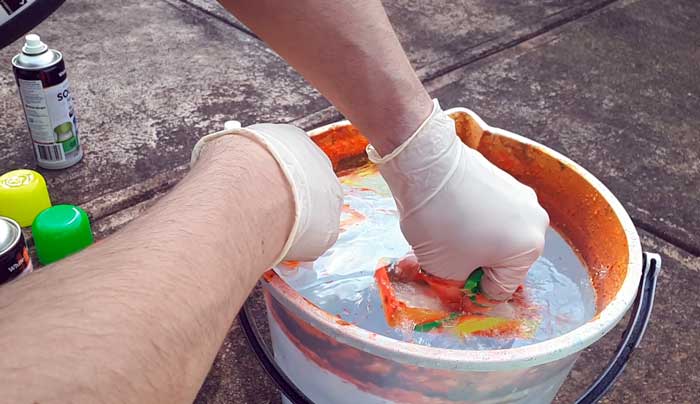
Pick up your guitar or pedal and slowly lower it into the water at an angle.

Aim to smoothly lower it in the water without shaking or moving it around.

If you want a zig-zag pattern on your guitar as you can see in the below guitar, you simply need to slowly move the guitar side to side as you lower it into the water.

You can see that the above guitar was lowered into the paint vertically and moved side to side to create a zig-zag pattern. You can create some interesting curvy lines this way.
Keep slowly lowering your item until it is completely submerged.

Once it is completely submerged, make sure you don’t accidentally let it touch the surface or more paint will stick and ruin the pattern.
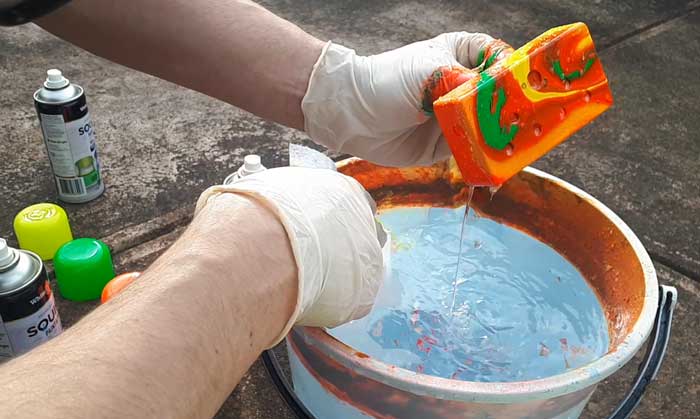
Step 8: Remove Your Item
Take some paper towels or use your gloves and clear the surface of the water.
Be careful not to agitate the water too much or some paint may fall below the surface and stick to your item.
Once you have cleared the surface completely, carefully raise your guitar or pedal out of the water.
Let the water drain and be careful not to let it touch the side of the container.
Hang the guitar up to dry or place your pedal enclosure somewhere to dry.
Step 9: Dry and Clear Coat
Let your paint completely dry before you apply a clear coat.
Depending on the thickness of the paint, this may take one or more days.
Be patient. You don’t want to ruin all of your effort by not giving the paint enough time to dry.
Once the paint has completely dried, give it a few coats of clear.

The clear coat not only helps protect the paint, but it also helps bring the colors to life.
Depending on how smooth you want your item to be, you may decide to lightly sand and buff the surface.
I didn’t do this with my guitar pedal because I liked the bumpy texture the dip created. But for a guitar, you may prefer having a mirror-smooth finish.
To do this properly, you need to sand in between coats of clear after each coat has completely dried.
Use high grit wet-and-dry sandpaper starting at 1200 grit and working your way up as high as you like.
If you do this, be extra careful not to sand down below the clear coat layer or you will ruin your artwork.
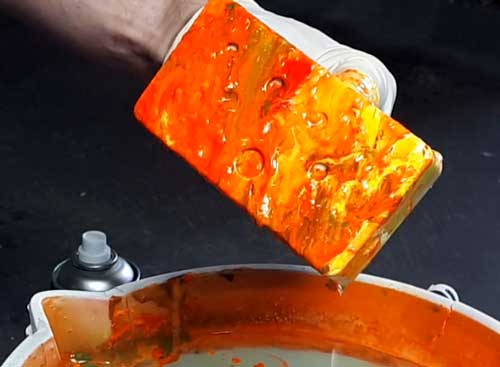
Here’s the end result of this hydro dipped guitar pedal:

This is a Fuzz Factory clone I built from a kit. I explain the entire process of building the Fuzz Factory clone in this guide.
If you are interested in building your own guitar pedals, read through that guide to learn about the process, best practices, mistakes to avoid, and more.
Subscribe to updates to get notified when these upcoming DIY guitar pedal guides are available.
Hydro Dipping Tips
Here are some quick tips to keep in mind when Hydro Dipping a guitar or guitar pedals.
Use Gloves
I learned this lesson the hard way. As soon as I started lowering my guitar pedal into the water the first time, I realized I had forgotten my gloves.
I spent the next 30-minutes scrubbing my hands with turpentine to try and get the paint off. I still have some paint on my fingers a week later.
Use gloves!
Water Temperature
You may have seen conflicting information by other people on what water temperature you should use when Hydro Dipping.
Some people say that water straight from your tap is fine, while others say it should be luke-warm.
I tested a few different temperatures (cold tap water, luke-warm water, bath-warm water) to see whether temperature changes results.
I didn’t notice any differences in the paint or in the end result.
Unless you’re doing this in the middle of winter or you live in a very cold climate, cold tap water should be fine.
Indoors vs Outdoors
You need to decide whether you want to Hydro Dip indoors or outdoors. The right option for you depends on the weather and if you have a suitable space indoors.
If you’re using spray cans, I suggest doing this outdoors in an area sheltered from the wind.
If you want to do this indoors, use a well-ventilated area, because the particles from the spray will quickly build up in any room.
Have Paper Towels On Hand
As soon as you dip your guitar or guitar pedal into the water, you need to clear the paint on the surface to lift your guitar back out.
While you can use your hands, I found that paper towels make this quicker and easier.
Have a few pieces nearby so you can quickly wipe up the excess paint.
Dip One Item at a Time
On my first attempt at Hydro Dipping, I dipped both parts of my guitar pedal enclosure at once.

I thought it would be a good idea to do both at once so they both have a similar pattern. I also thought it would save time.
It was a big mistake.
All it did was make things awkward trying to clear the excess paint and remove the items with no spare hands.
If you want to dip more than one item, do them separately. It might take more time to empty and refill the water in the container, but you’ll get better results.
Hydro Dipping Common Mistakes
While Hydro Dipping can produce some stunning results, it can also quickly turn bad.
I made plenty of mistakes as I learned how to Hydro Dip my guitar pedals and here are some important lessons I learned.
Bad Surface Preparation
Preparing your guitar or guitar pedal before you dip it will make a big difference in how well the paint sticks to the surface.
If you don’t apply a base coat or properly sand your item, you may find the paint doesn’t stick properly or you end up with ugly gaps in your artwork.
Think of the base coat you apply to your guitar as the Plan B artwork. If there are any gaps or thin sections in the swirls, you’ll see the base coat through it.
A white base coat is a safe choice as it can help thin sections of paint to appear nice and bright.
On my guitar pedal, I applied a yellow base coat as I didn’t want to see white at all.
Lesson: take your time to properly prepare the surface or you may end up with ugly gaps or smears.
Wind
If you’re planning on Hydro Dipping outside, make sure it’s a still and clear day.
The problem with the wind is that the thin film of paint or graphics on top of the water can easily move around.
A slight breeze can blow the paint around and ruin any pattern or nice swirl you create.
Lesson: if you want to do this outdoors, avoid any wind or breeze.
Spraying Height
This is really important to understand and something that I didn’t see mentioned at all before my first attempt.
If you use spray cans for your Hydro Dipping, the height you spray the paint makes a massive difference in the quality of your results.
If you spray the can too close to the water, the paint will separate into blobs and water may flick up on top of the paint.
You’ll end up with a blobby mess as I did as you can see below:
How do you know if you’re spraying too close? You’ll see the paint separate and ripple as soon as it hits the water as shown below:
Notice the ripples in the paint sitting on the surface of the water? That’s a clear sign that the spray can was too close to the surface.
Spraying further back as shown below significantly improves your results.
If you spray the can too far away from the water, the paints will mix instead of creating separate layers. This can be great for some effects, but in most situations, you will want separate rings of color.
Lesson: don’t spray too close to the water or you’ll end up with blobs in your paint.
Dipping Speed
As you dip your guitar or guitar pedal into the water, the paint sticks on to the surface.
If you dip your guitar in too fast, the layer of paint won’t have time to properly grip to the surface and you’ll end up with smears or breaks in the paint.
If you dip your guitar in too slow, the paint may build up on the surface and the thick layer can create blobs or become runny.
Lesson: slowly dip your guitar or pedal in to give it time to properly stick to the surface.
Dip Angle
The angle of the item you dip into the paint matters. If the angle is too shallow, you may end up with bubbles in your paint.
On one of my attempts, I had the guitar pedal way too flat against the paint, which ended up in big bubbles and blobs on the surface.
If the angle is too steep, the paint may not properly stick to the surface or you’ll end up with a very thin layer of paint.
Lesson: lower your item into the paint at an angle so it doesn’t create bubbles but is able to properly stick to the surface.
Wrong Paint
There are a lot of different types of paints you can use for Hydro Dipping. Rustoleum spray paints are popular, but other brands can work perfectly fine.
I used fluoro ‘White Knight’ brand spray cans with decent (but not great results and other people have used a wide range of metallic and special effect paints with good results.
The key point is that you want to use paint that doesn’t mix with water. If you notice the paint sink below the surface, it’s not going to work.
Some paints will work better than others, so I suggest testing a few different brands to see what you like best.
Lesson: enamel paints generally produce the best results due to enamel being oil-based.
Not Enough Practice
Hydro Dipping is a skill that you get better at the more you practice it. My first few attempts were terrible compared to the next few attempts.
While it might be tempting to dip your guitar on your first attempt, I don’t recommend it.
Practice on scraps of wood or other items before you do it on your guitar.
The chances are you’ll mess up the first few attempts. Trust me when I say you really don’t want to have to strip the paint and sand your item down again after a failed attempt.
I re-dipped my pedal five times before I was happy with the result and it’s not fun to go through all of the steps again and again.
If you want to Hydro Dip your guitar, sanding and preparing the surface will take a lot longer than a guitar pedal. So get your practice in before you do it on your guitar.
Lesson: get plenty of practice before you Hydro Dip your guitar or pedals.
Hydro Dipping Video
Here’s a video of this build showing many of the mistakes I made along the way.
If you want to hydro dip your own guitar pedal or anything else, watch the video to get a better idea of best practices to follow and mistakes to avoid.
Want to Build Your Own Guitar Pedals?
The guitar pedal enclosure I Hydro Dipped in the above photos is for a Fuzz Factory clone I built from a kit. You can read about this Fuzz Factory clone build here.
I’m currently working on writing a series of tutorials, videos, and guides on how to build your own guitar pedals. I’ll cover everything from building a guitar pedal kit all the way to designing pedals and etching your own PCBs.
If you’re interested in building your own guitar pedals, subscribe to updates to be notified when the other DIY guitar pedal guides are online.