
There are some upgrades you can do yourself at home that can give your guitar’s tone and playability a nice boost. If you like your guitar but feel it’s a bit lacking in some areas, rather than completely replace it with a different guitar, you might want to consider some upgrades or mods.
In this guide let’s look at some easy upgrades you can install by yourself and how they can improve your guitar.
Stopping Strings From Breaking
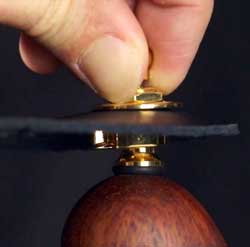
If you regularly break strings, this simple upgrade can be a game-changer. Breaking strings used to frustrate me so much as a beginner. Looking back I now know I could have prevented the issue by replacing the bridge saddles to a set designed to protect your strings.
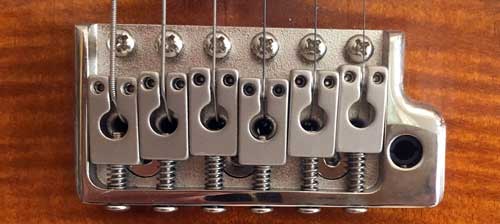
The String Saver saddles by GraphTech (one of their models shown above) can be a significant improvement over stock saddles. If you have a mid-ranged guitar or lower, the chances are you will see a big improvement in how long your strings last when changing over to String Savers. They may even improve your guitar’s sustain so if you feel your guitar’s sustain isn’t quite what it should be, you might find upgrading to these helps.
There are quite a few String Saver models to match the different types of bridges out there (eg: strat, LP, Floyd Rose) so check out the different options here to find the one that suits your guitar.
The type of strings you use also plays a role in how easily they break. Find out how different metals, gauges, coatings, and more affect the playability and tone of your strings in this guide: Ultimate Guide to Guitar Strings.
Getting Rid Of Hum With Shielding
There’s nothing that ruins a tone faster than hum or noise. A constant hum can kill any inspiration you get from your tone and can ruin recordings. While there will always be some noise or hum with magnetic pickups, there are things we can do to reduce unwanted noise.
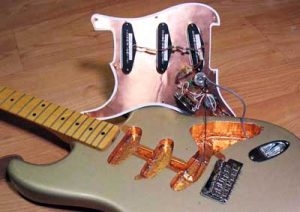
Shielding your guitar’s cavity and components is one possible way of reducing noise and interference. While some guitars do have good shielding, many are shockingly poor. Buying some foil tape and completely covering the inside of your guitar’s cavity (as seen in the photo to the right) could be all that it takes to remove a lot of background noise in your tone.
Check out this guide on Getting Rid of Hum, Buzz and Noise for more details on shielding your guitar.
Noiseless Pickups
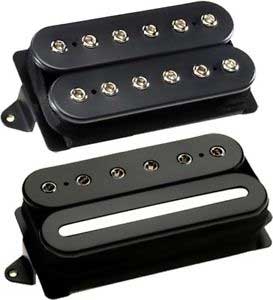
If shielding your guitar doesn’t improve your hum and you’ve gone through the guide on getting rid of hum, the other option is to buy a set of Noiseless pickups. These pickups are designed to give you an authentic single-coil tone without the hum that usually comes with single-coils. The below pickups are Fender Noiseless Singlecoils:

There are a lot of options for noiseless pickups so if you like single-coil tone but don’t like how much noise your pickups are producing, it’s worth looking at options like these. Read through this guide for advice on how to change your pickups.
Upgrade Your Pickups
Upgrading your pickups can have a dramatic impact on your tone. High-end guitars usually come with excellent quality pickups, but as the guitars get cheaper, so do the pickups. If you feel your guitar’s tone is lacking or you’re starting to outgrow it, consider upgrading your pickups.
In this tutorial on changing your pickups I explain:
- How to decide whether to upgrade your pickups or not
- How to find the right pickups for you
- Step-by-step instructions (with photos) on how to change your pickups
- Useful tips and tools
In the guide, I explain how upgrading the pickups in my mid-range guitar gave it a serious tone improvement.
While you can pay for somebody else to change your pickups, you might be surprised by how easy it is to do yourself.
It’s also a good idea to read up on active vs passive pickups if you’re considering changing your pickups. While most people will prefer to stick to the type they already have, you may find that changing to active pickups suits you better. Find out everything you would want to know about active pickups here.
Get More Tonal Options With Coil-Splitting
If you have a guitar that uses at least one humbucker, there’s a way you can get more tones without changing the pickups you have. You can access far more tones while keeping your current tones with this mod. If you like the idea of getting single-coil tones from your guitar, this mod will suit you.
Coil splitting is when you split a humbucker so you basically end up with two single coil pickups. Coil-splitting is far more common than coil-tapping and more useful when it comes to the different tones you can create.
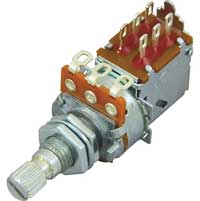
The only thing you need to buy for this upgrade is a push-pull potentiometer like this one and a soldering iron if you don’t already have one. A push-pull pot allows you to change back and forth between regular wiring as you have it now and coil-splitting. That’s the great thing about this mod – it doesn’t change what you have available now. You can still access the same tones, then you pull the pot to switch into coil-splitting mode.
To coil-split your humbucker, you need to rewire your guitar. If you’re comfortable with the idea of following a diagram like the below example, you can easily mod your guitar to coil-split your humbuckers.
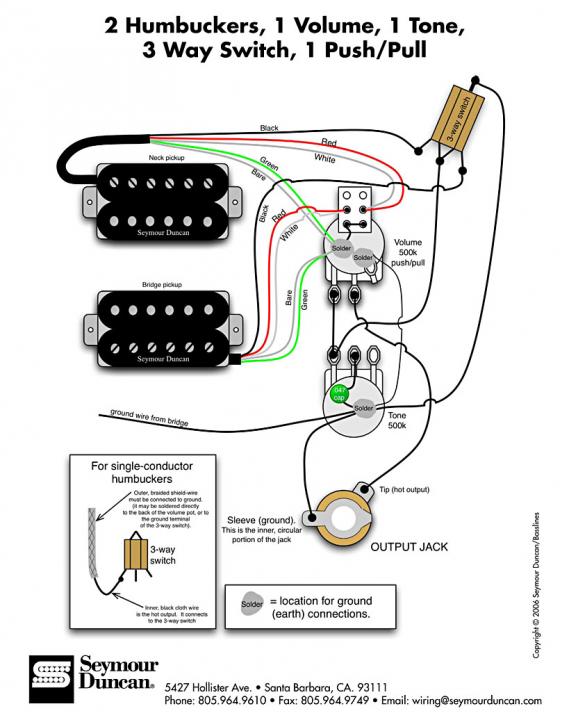
The above diagram is just an example and may not apply to your guitar. I’ll write another guide with step-by-step instructions on how to do this so subscribe for updates to find out more.
Protect Your Guitar With Upgraded Strap Locks
This upgrade recommendation hits close to home for me. When I was 16 I witnessed my pristine and well-cared-for guitar fall and smash onto concrete as a friend’s brother tried to pick up my guitar by the strap. As you would expect, it slipped through the strap and landed right on the body’s edge. While any guitarist should know not to carry a guitar by the strap, there will be times when a regular strap can come loose.
A simple upgrade of the strap locks can save you the heartache I felt when I had to completely wood-fill, sand and paint my guitar to fix the damage.
There are quite a few options available and one of the most popular is the Schaller strap lock system.
The basic idea with these strap locks is that they clip your strap onto your guitar with an actual locking mechanism rather than just a hole in the strap. When you switch a guitar over to one of these strap lock systems, you’ll wonder why people ever trusted the non-locking straps.
Try Something Different With A Killswitch

This is a very niche mod for your guitar and won’t suit most guitarists. You’ll know straight away whether this mod is right for you based on what it can do for you. A killswitch is basically a button or toggle you install that can instantly kill your signal (hence the name).
Guitarists such as Buckethead (shown to the right) and Tom Morello have used killswitches to come up with interesting rhythmic effects in their music. The iconic riffs in Rage Against The Machine’s Know Your Enemy, Guerrilla Radio, Bulls on Parade and others were created thanks to a killswitch (check out this guide to learn more on Tom Morello’s gear and effects). that sound similar to a tremolo pedal.
There are a few different options for killswitches to suit your style. You can have a chrome or black button as well as an option for an illuminated ring around the button. Check out a few different options here.
This mod isn’t for everybody, but if you know some songs that make use of a killswitch, it might be something you might want to play around with.
Bonus Upgrade: Use The Four Cable Method
All of the above upgrades require you to make some sort of modification to your guitar. This extra tip can give you an ‘upgrade’ to your tone and you may not even need to buy extra equipment. If you use guitar pedals and your amp has FX SEND and RETURN jacks, you can make use of something called the ‘4 cable method’.
This detailed guide of the 4 cable method explains what the method is and how to set it up. If you’ve never heard of it before, it’s a way to potentially improve your tone by placing some of your effects pedals in an ‘effects loop’. The idea is to place some pedals in front of your amp and some behind the amp in the signal chain instead of everything in front of the amp. Some pedals such as delay, reverb, chorus and some other modulation pedals sound significantly better when placed in the amp’s effects loop.
If your amp has an effects loop available, make use of it for an instant upgrade of your tone. If you want to learn more about different effects and which ones are suited for an effects loop, check out the Guitar Effects Course here.